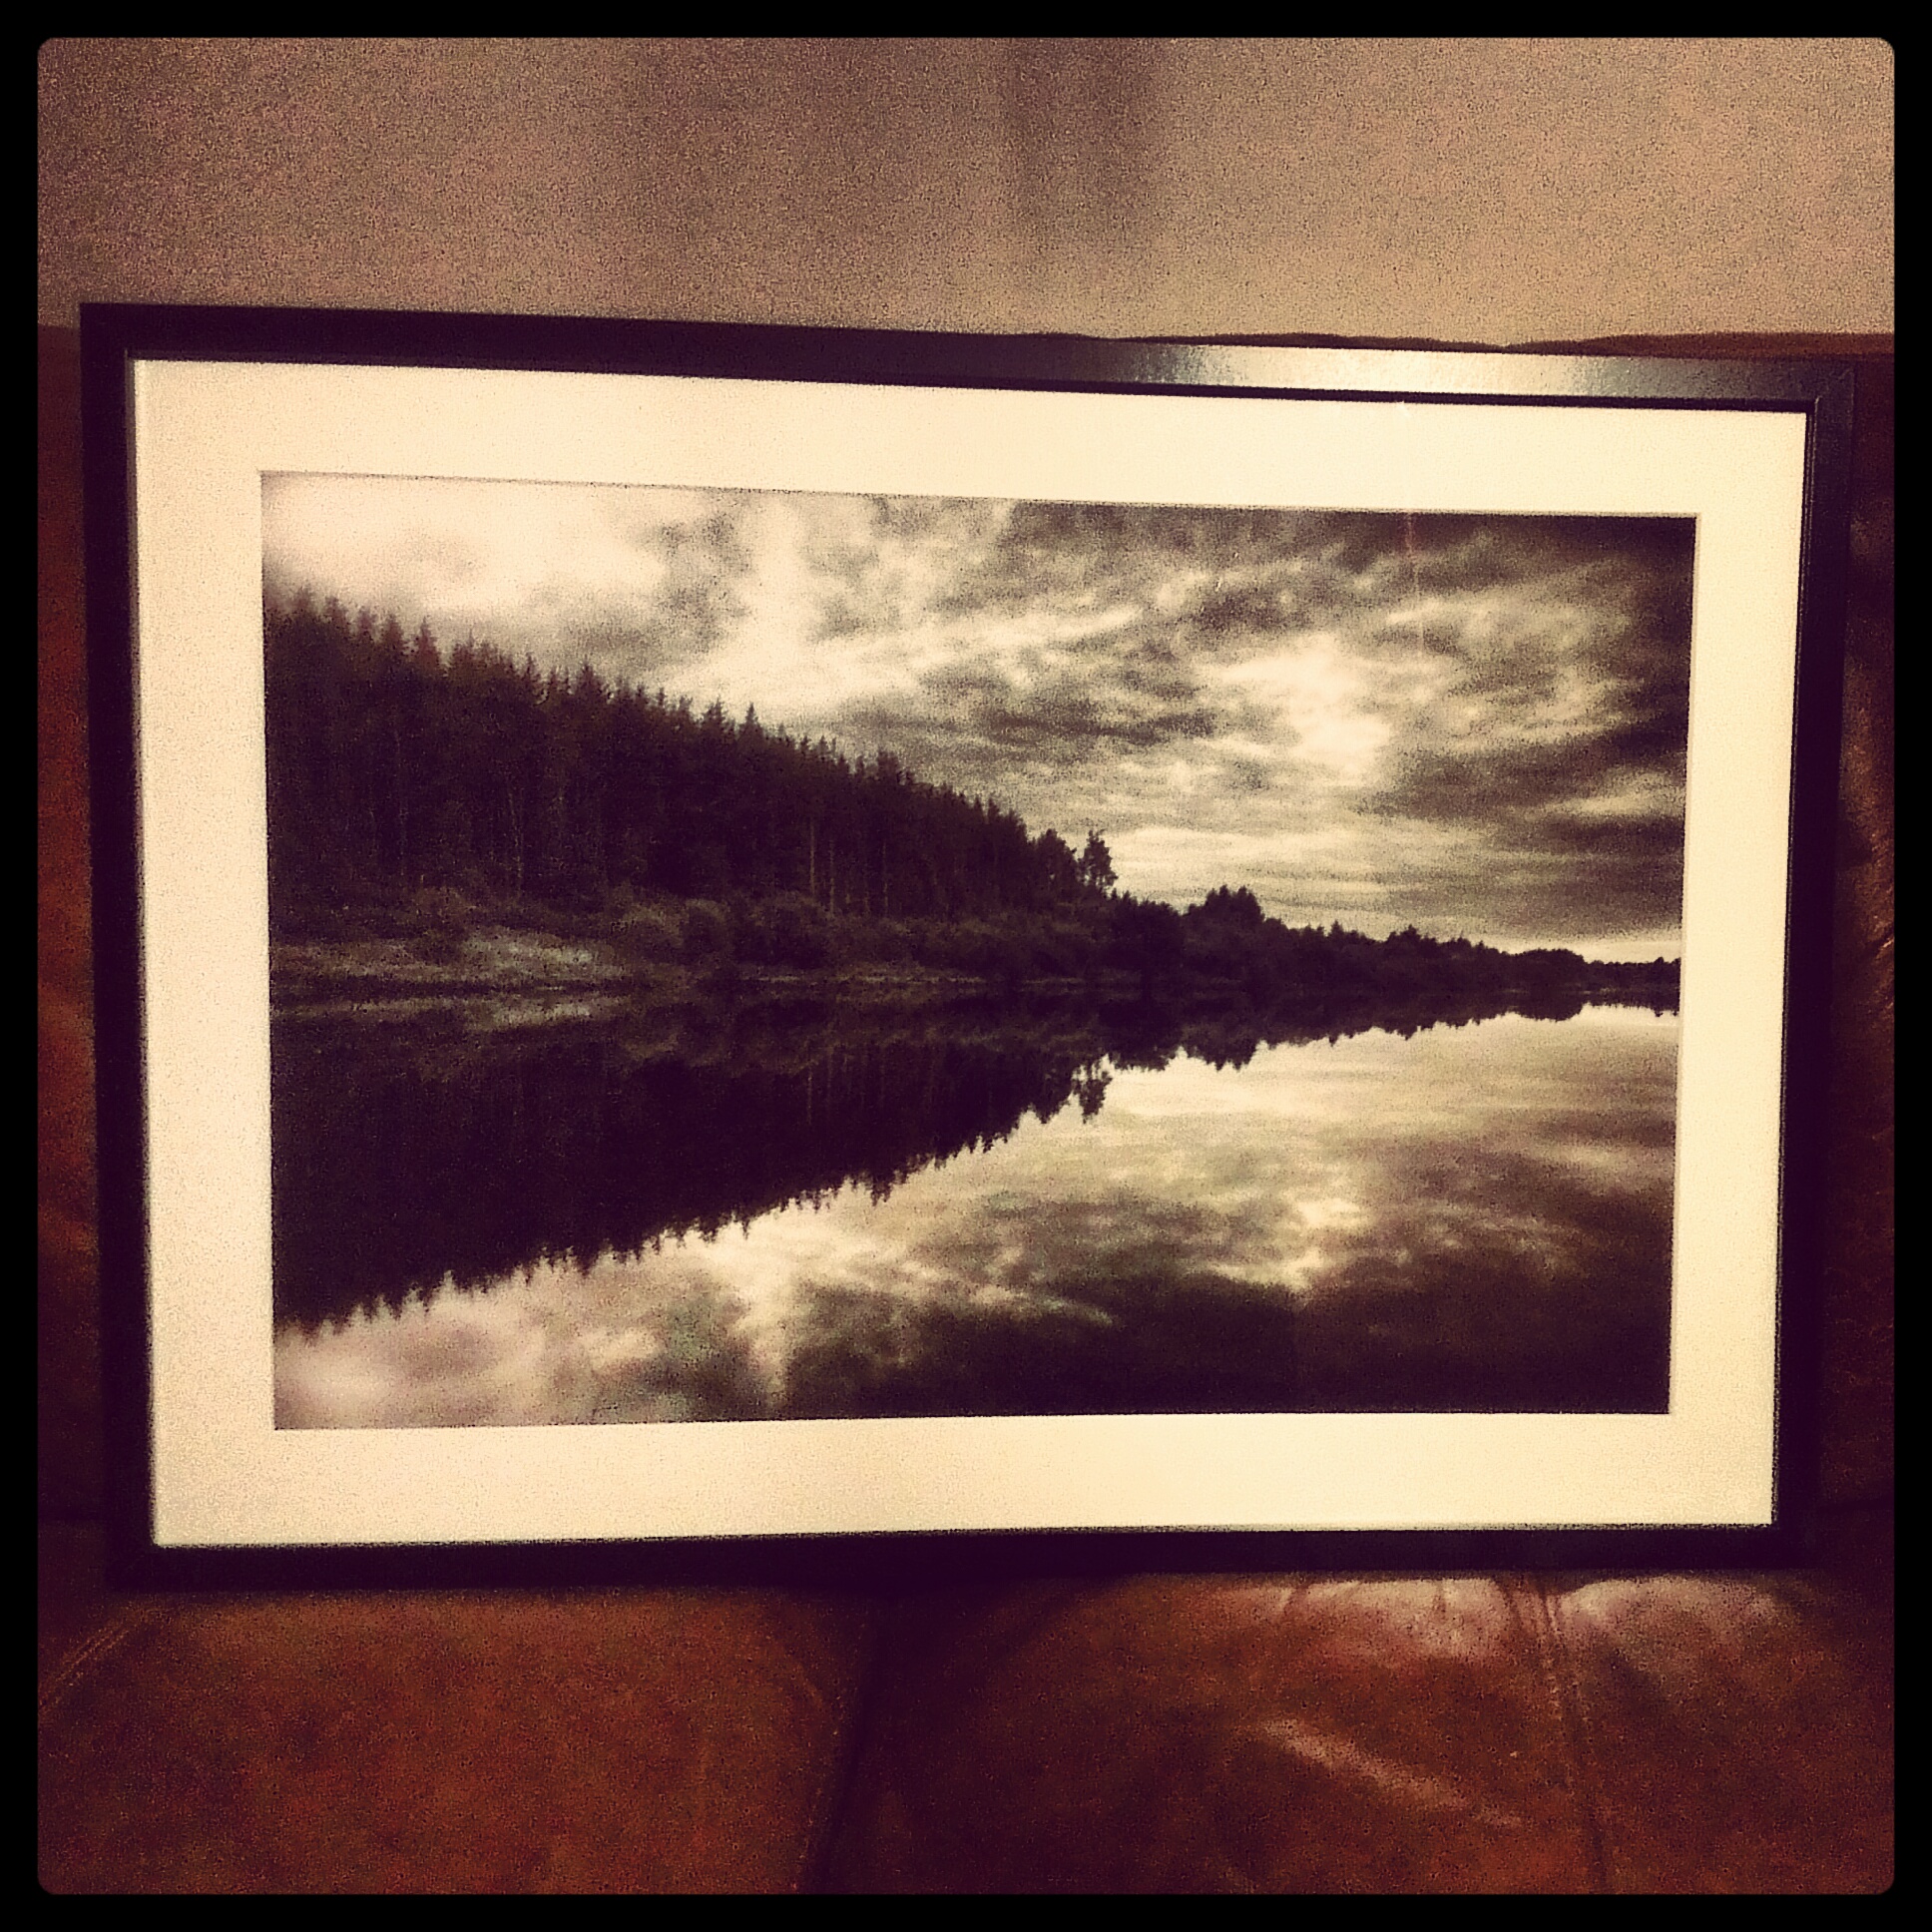
A couple of my pictures are in the Show Us Your Art exhibition this weekend!

Geek, cyclist, ecoist and bad photographer. I develop systems and fiddle with WordPress.
A couple of my pictures are in the Show Us Your Art exhibition this weekend!
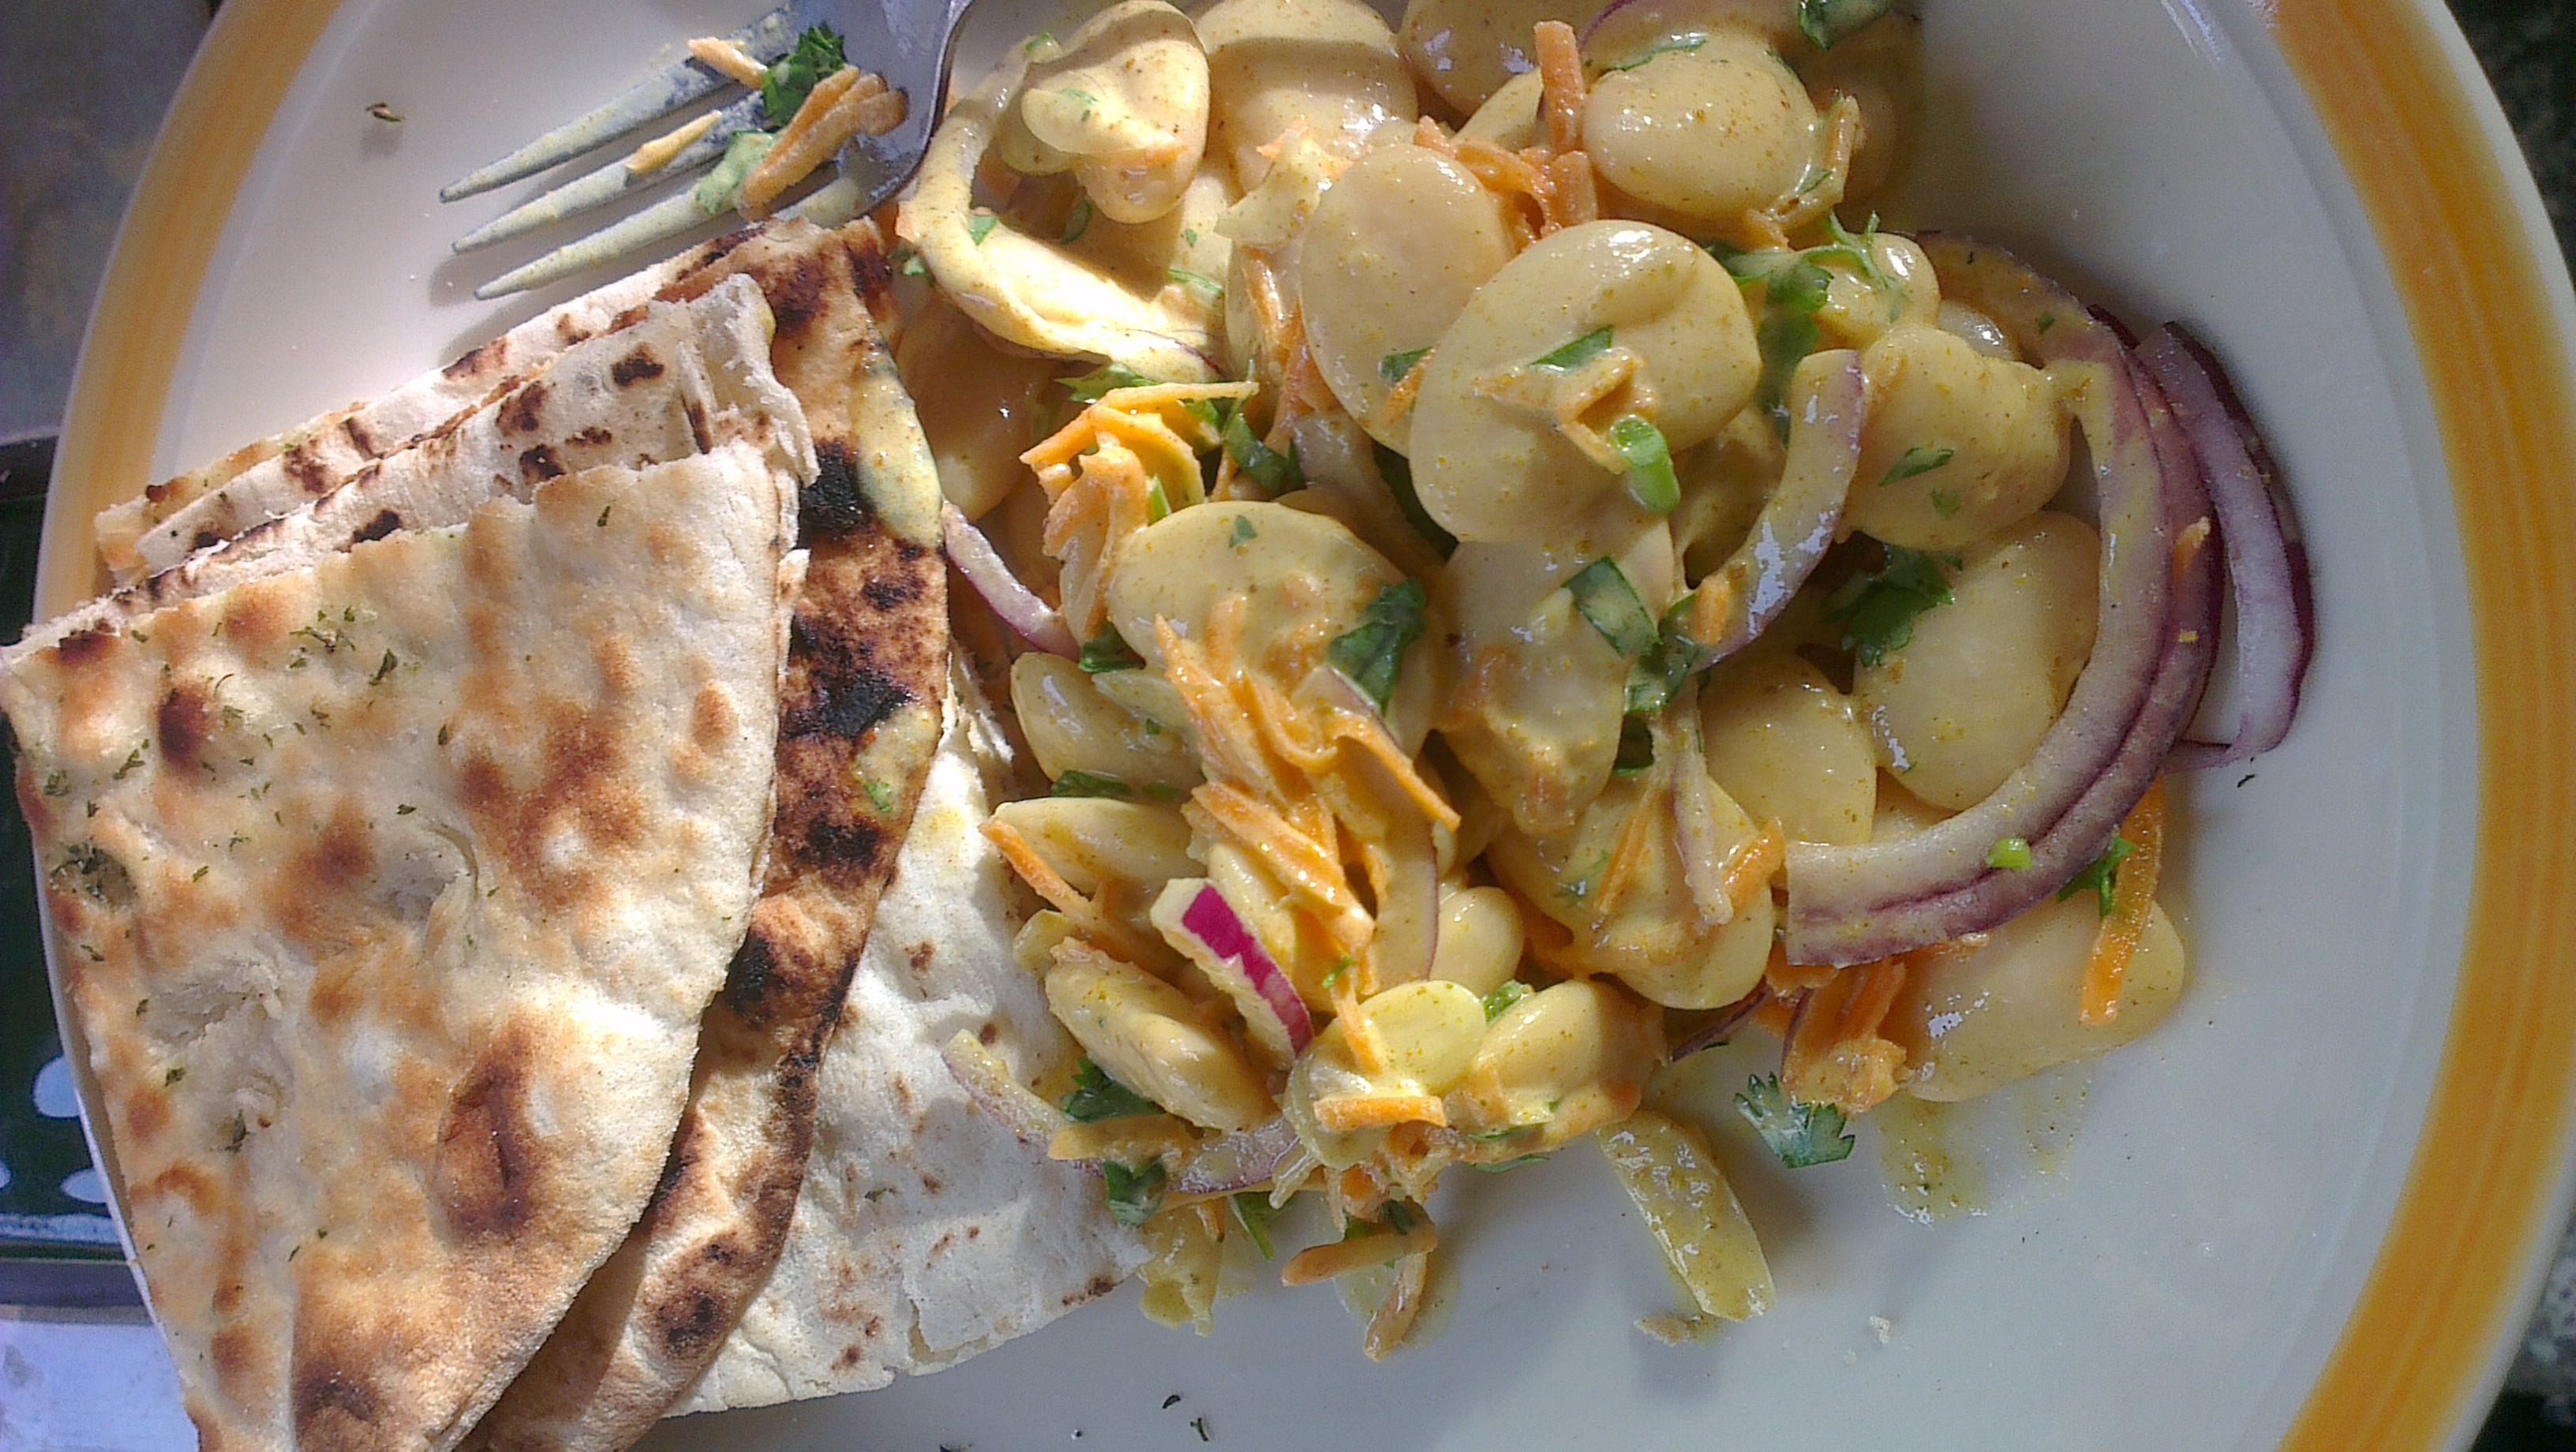
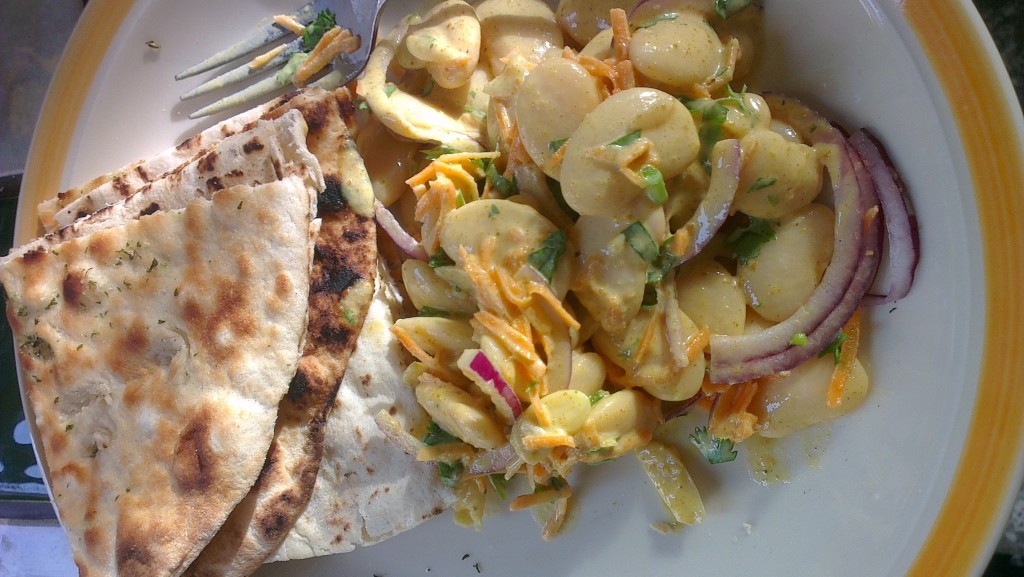
Coronation butter beans, a delicious Coronation Chicken alternative for vegetarians. Pretty damn tasty!
Ingredients – Makes about enough for 8 people to dip into at a party!
4 tins of good quality butter beans, drained
1 large tablespoon of mango chutney
2 large tablespoons of Greek yogurt
2 large tablespoons of good mayonnaise
1 large tablespoon of madras curry powder (hot)
A sprinkling of flaked almonds
1 large carrot, peeled and grated
1 small red onion, thinly sliced
A handful of chopped coriander
You might also want…
Flat bread, pitas or naan
Method
Place the mango chutney, Greek yogurt, mayonnaise and curry powder in a large bowl, mix until combined.
Taste the mix to see if it’s to your liking, add a bit more curry powder if you like!
Add the butter beans and flaked almonds, stir until coated.
If you’re ready to serve now, then carry on, if you’ve got a few hours, cover and place in the fridge for the flavours to get into the butter beans.
Transfer the mixture to a serving dish, sprinkle on the grated carrot, sliced red onion and grated coriander.
Serve with flat bread, pitas or naan!
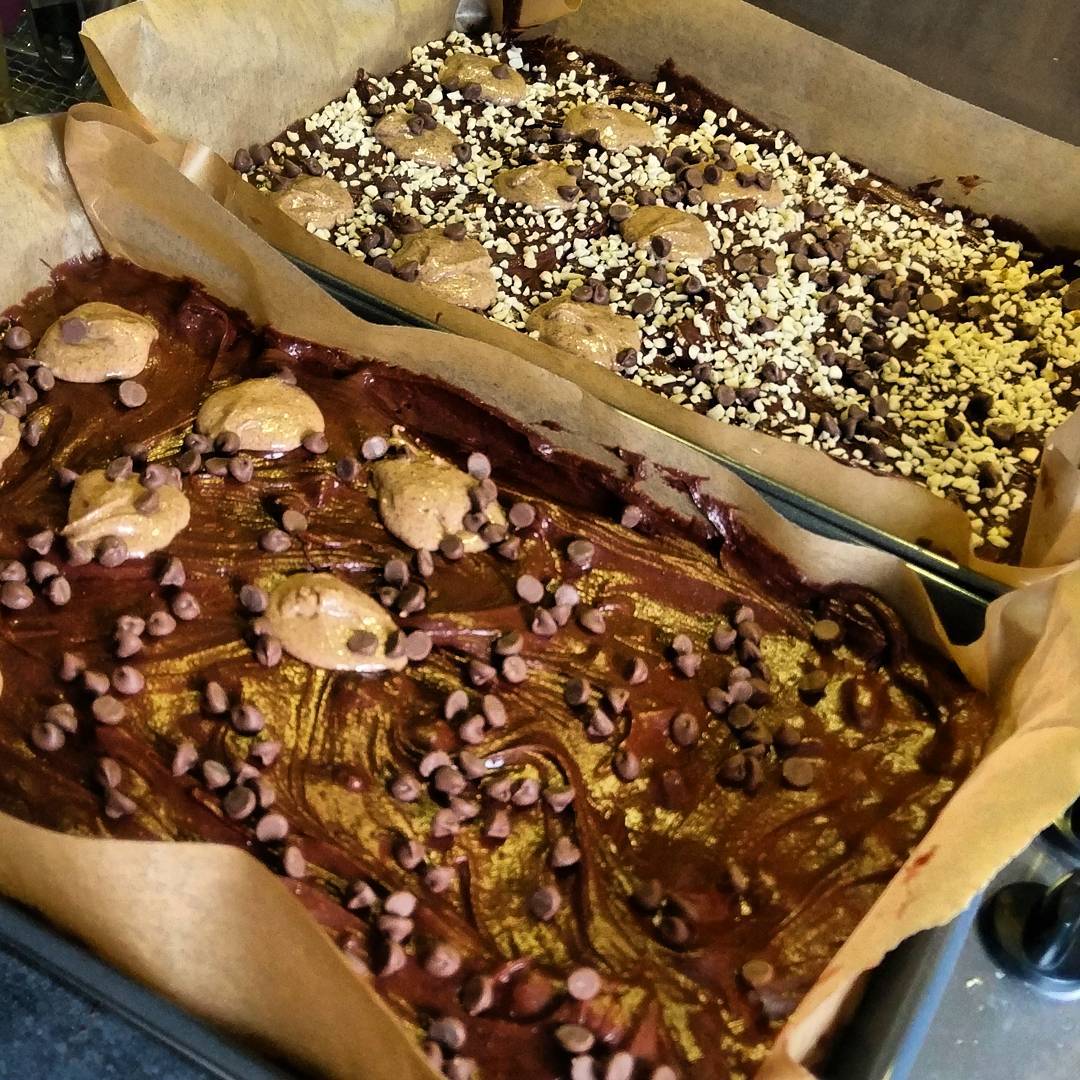
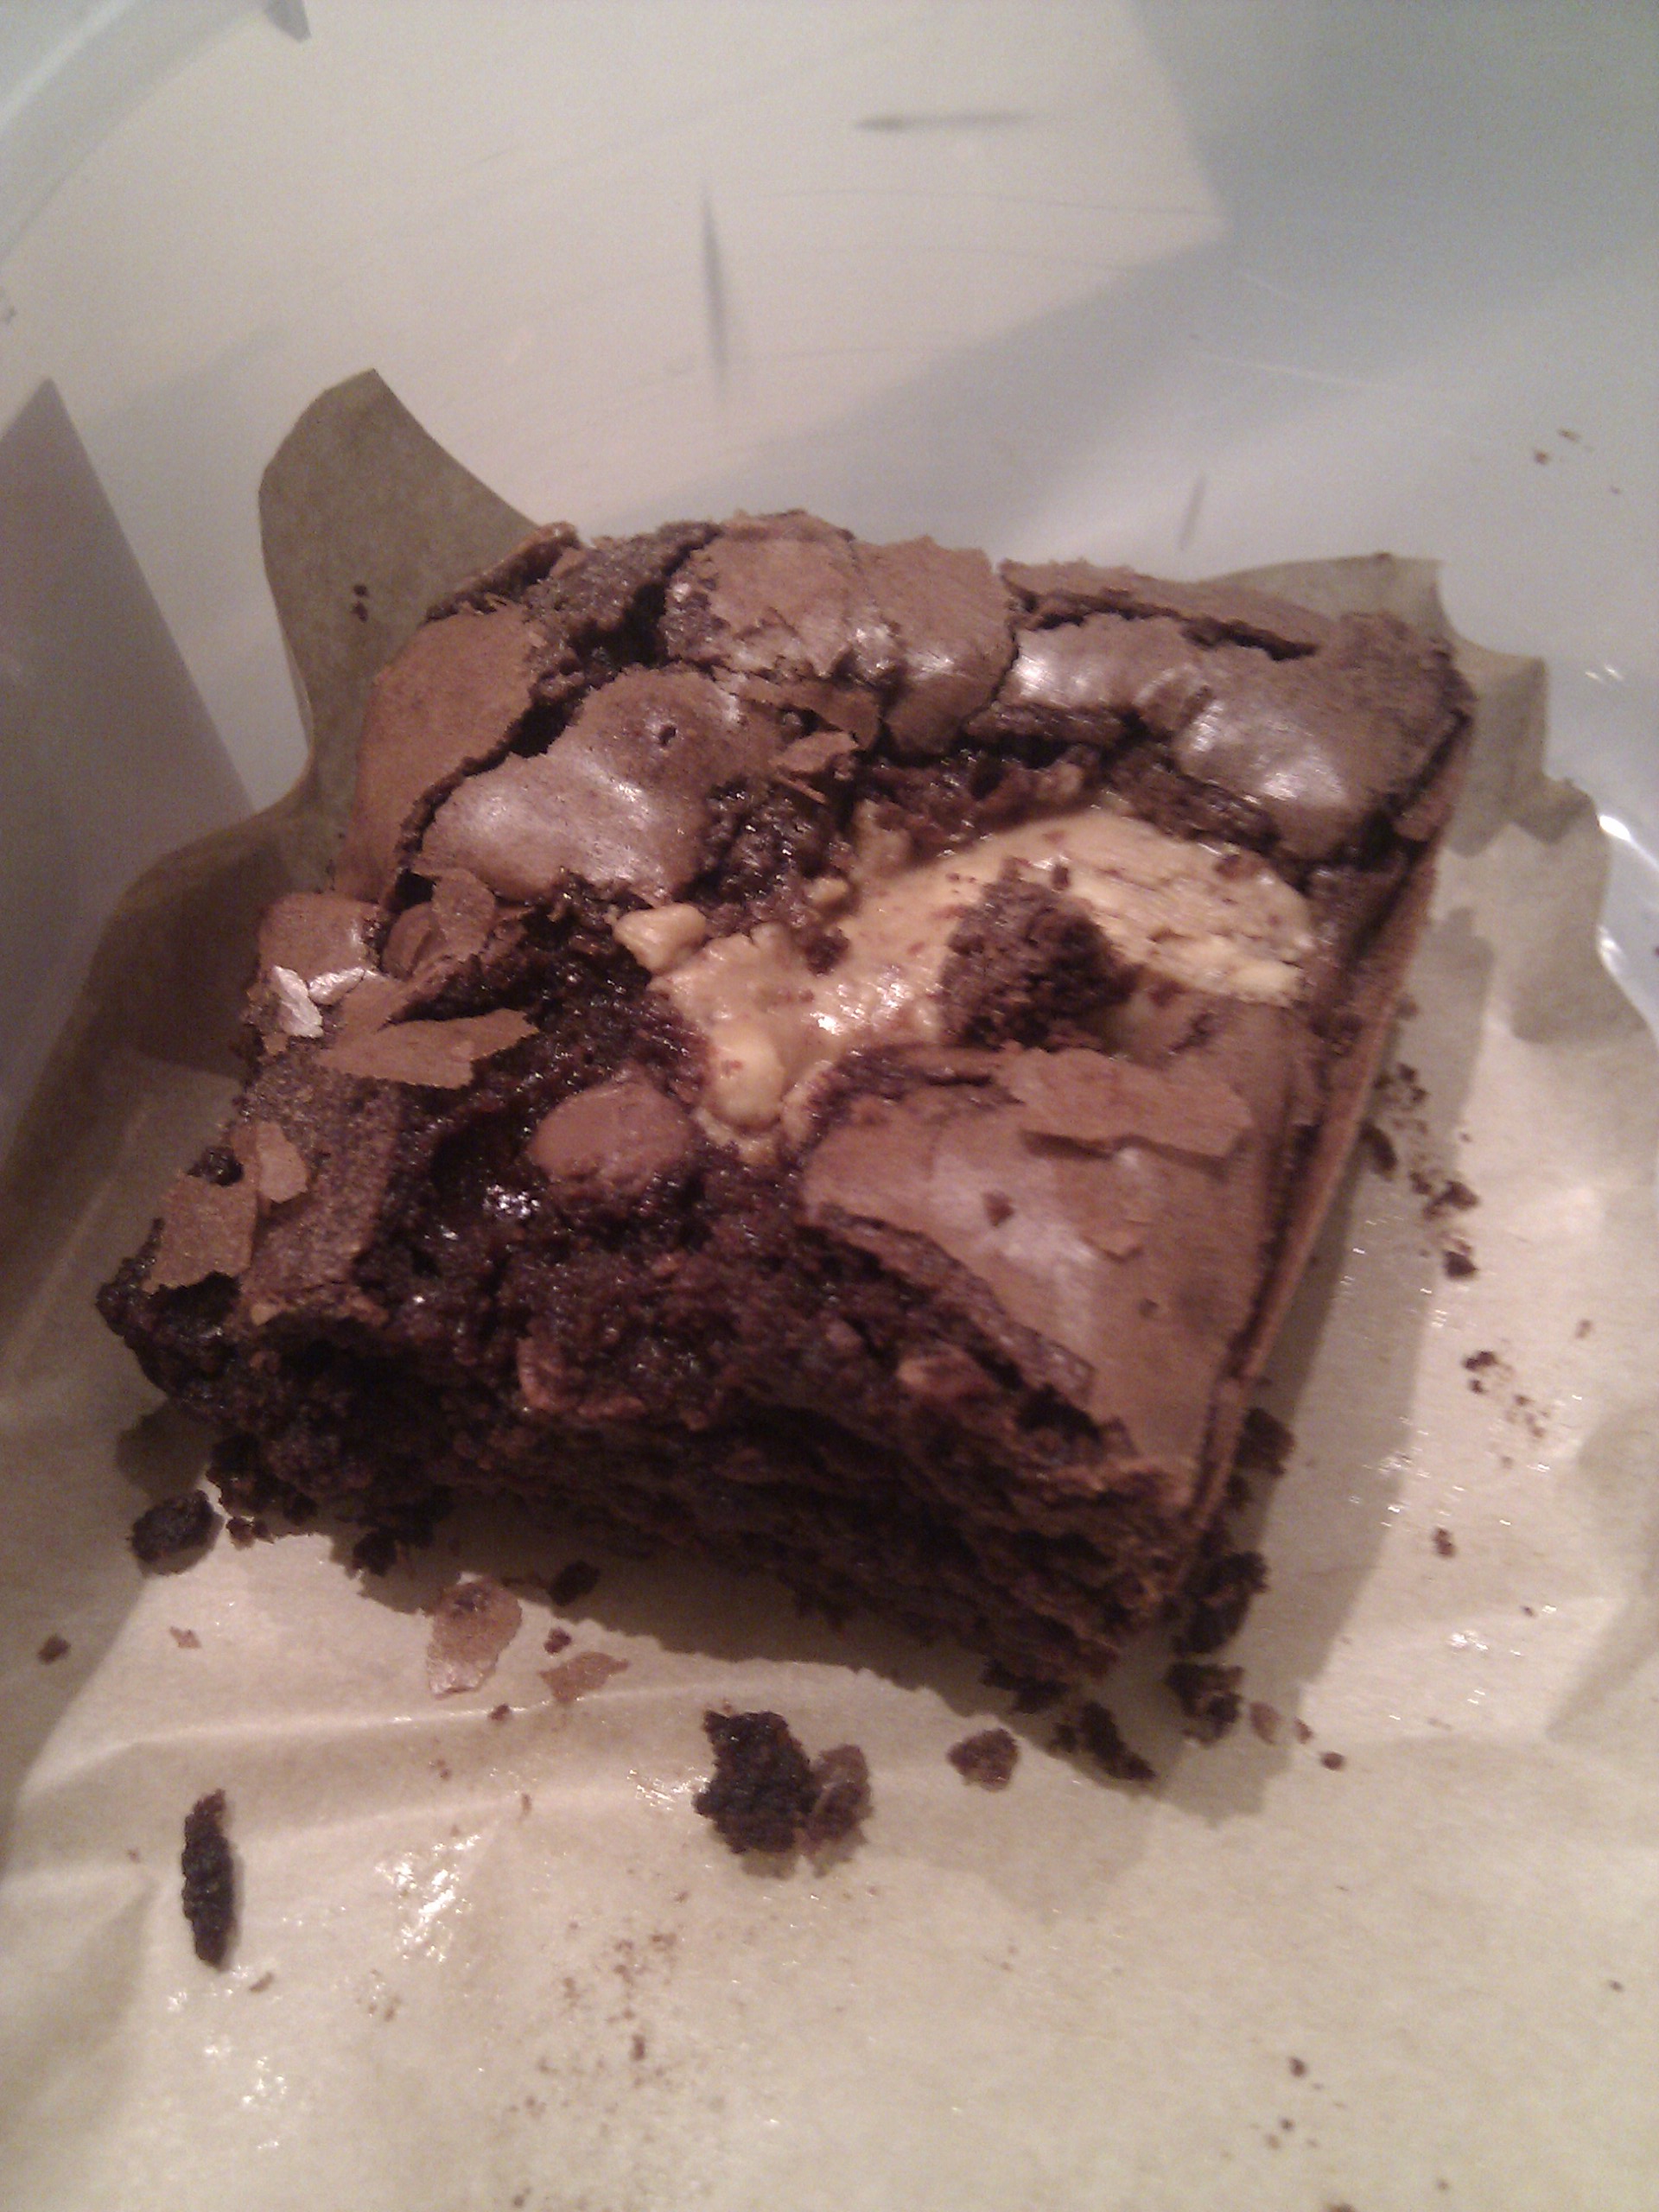
I made this chocolate brownie (without the peanut butter) to give as Christmas presents to friends last year. It’s gooey and incredible, the peanut butter gives it a lovely taste and crunch!


Ingredients
250g of unsalted butter
300g of good dark chocolate
135g of plain flour
60g of cocoa powder
150g of good white chocolate, chopped into small pieces
150g of good milk chocolate, chopped into small pieces
A large handful of milk chocolate drops
6 medium free range eggs
410g of caster sugar
A jar of good crunchy peanut butter (Meridian brand if you can get it)
Method
Cut up the butter and chop the dark chocolate into chunks, add them both to a heavy pan and melt slowly over a low heat. Use the bain marie method if you can be bothered. When melted, leave to cool.
Sieve the flour and cocoa into a bowl and set to one side.
Break the eggs into another bowl, add the caster sugar and beat with an electric mixer until the mix has doubled in size. If you lift the beaters from the mix and it leaves a trail for a few seconds, it’s done!
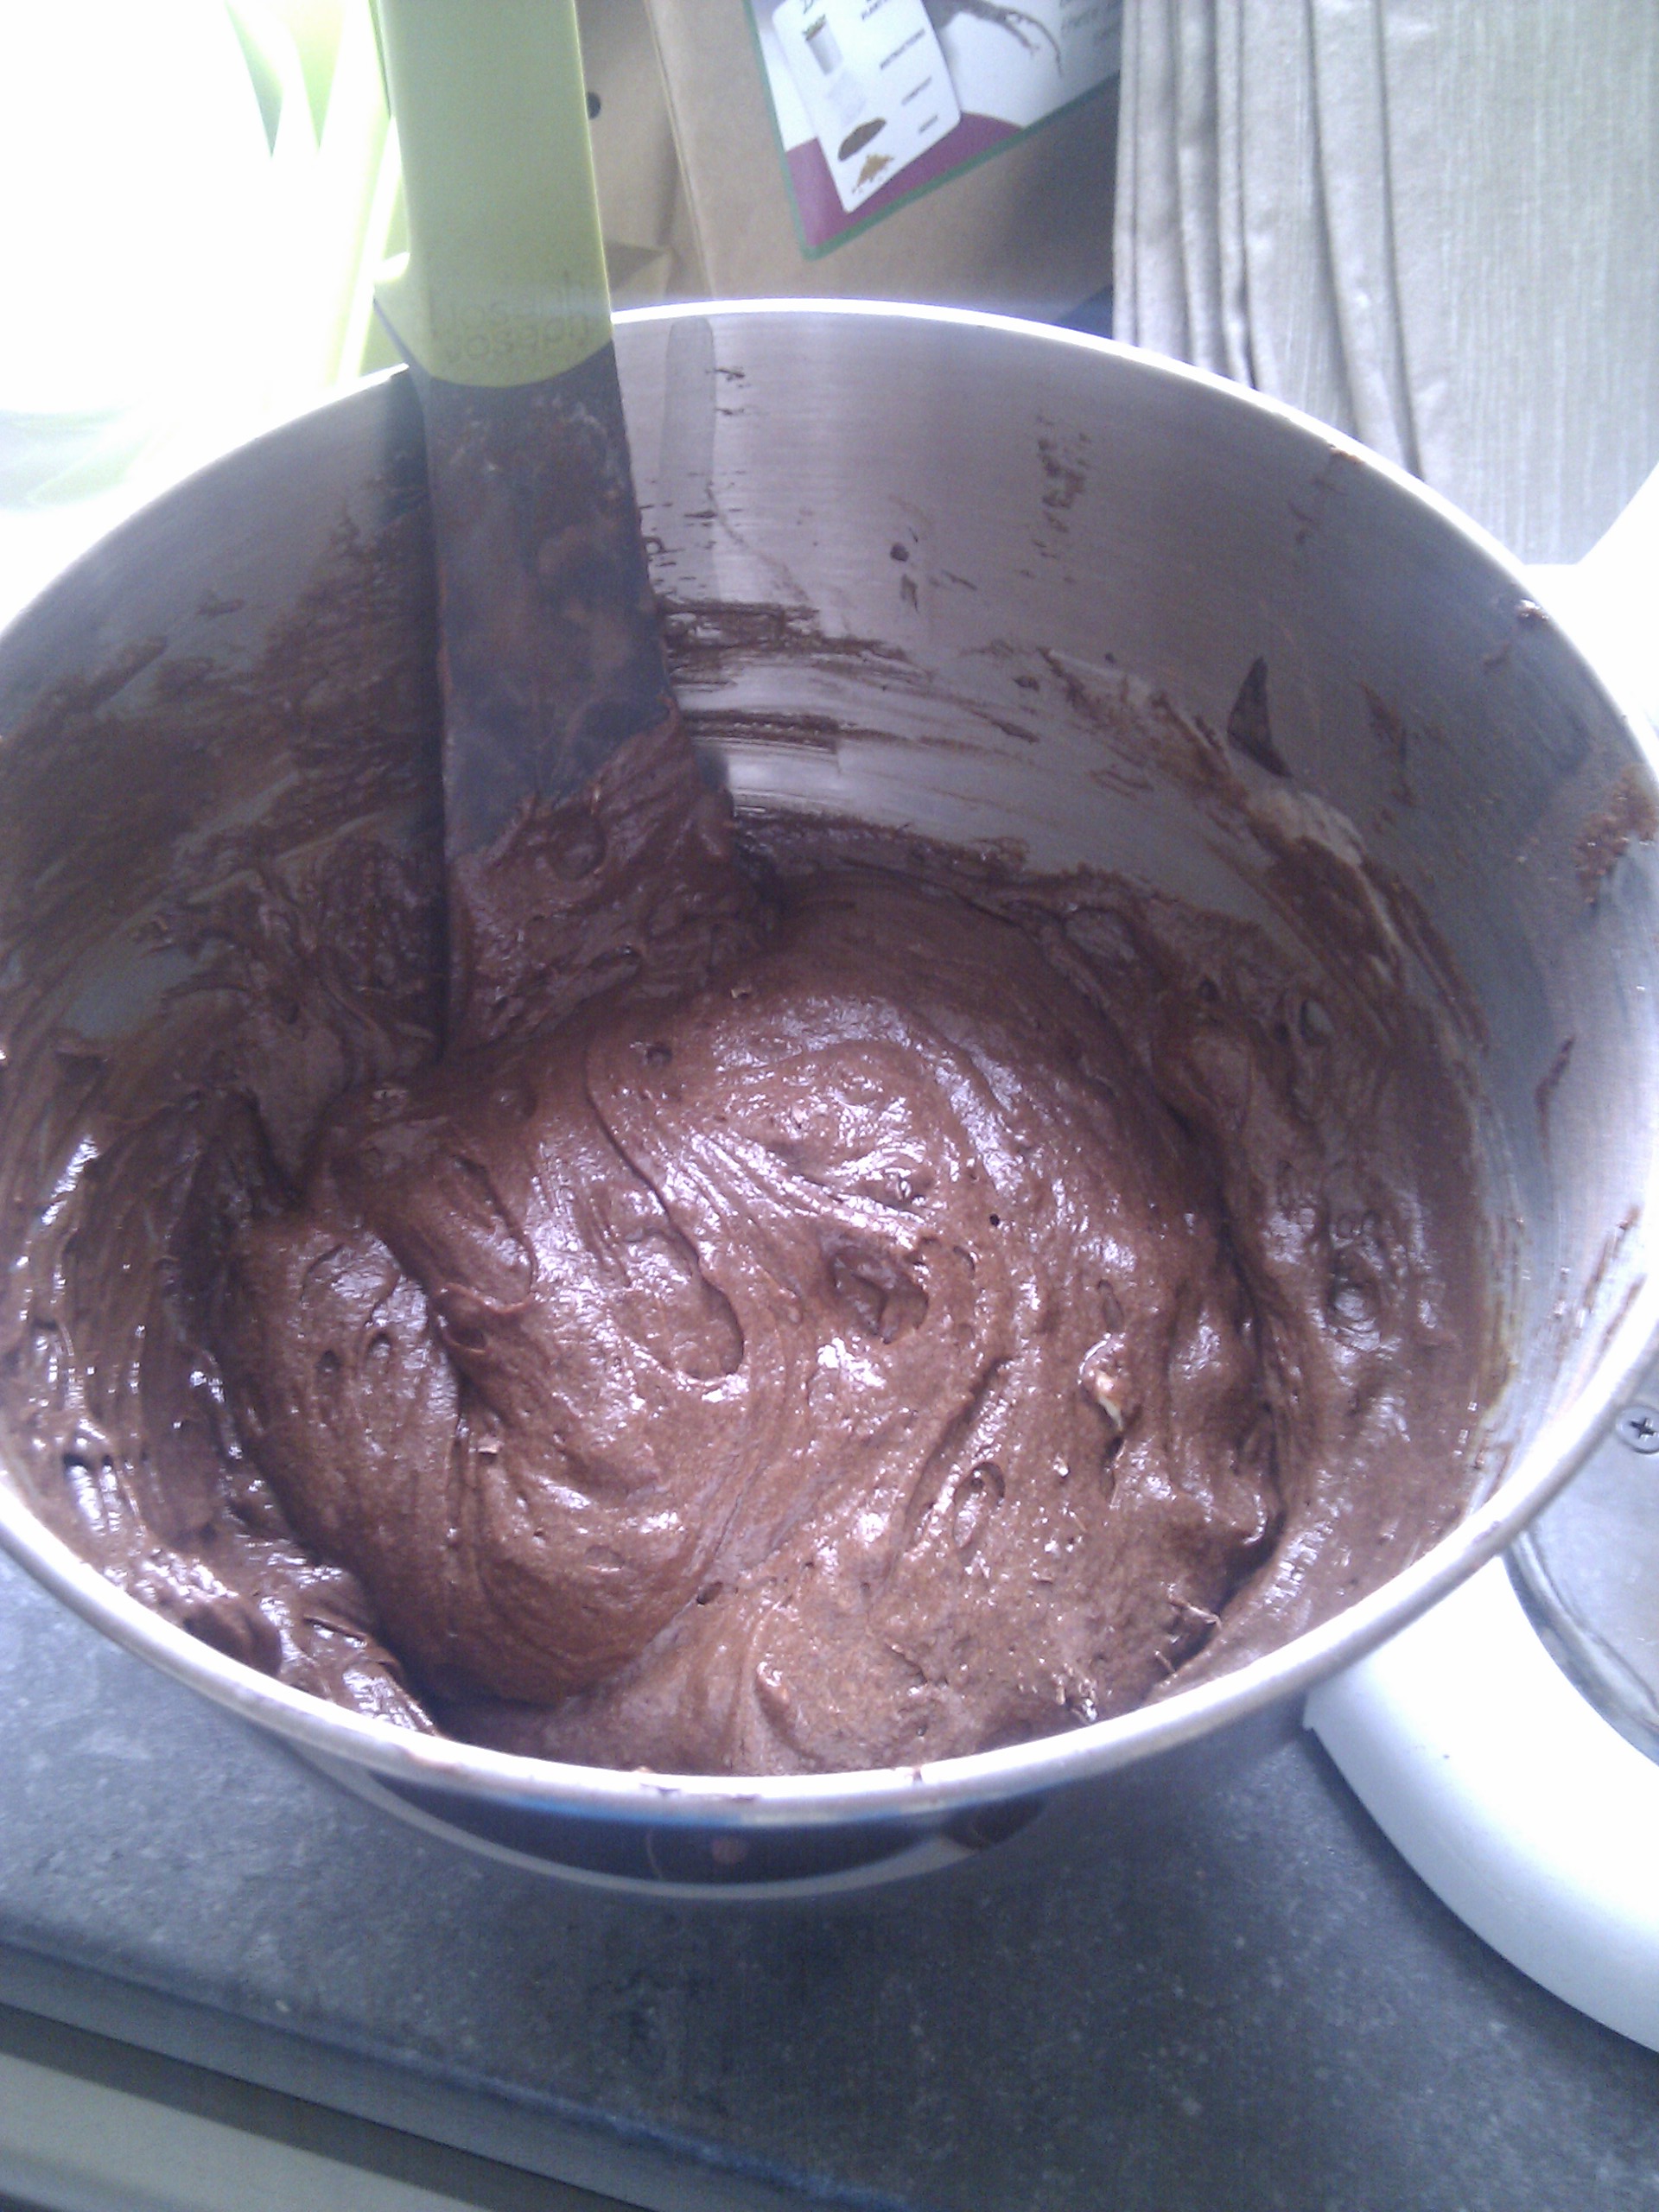
Pour the cooled chocolate over the eggs and sugar. Gently fold it in to avoid knocking all the air out of the mixture.
Hold the sieve over the eggy chocolate mixture and re-sieve the flour and cocoa into it, gently fold it into the mixture to avoid knocking more air out.
Add the chopped white and milk chocolate to the mix and stir in.
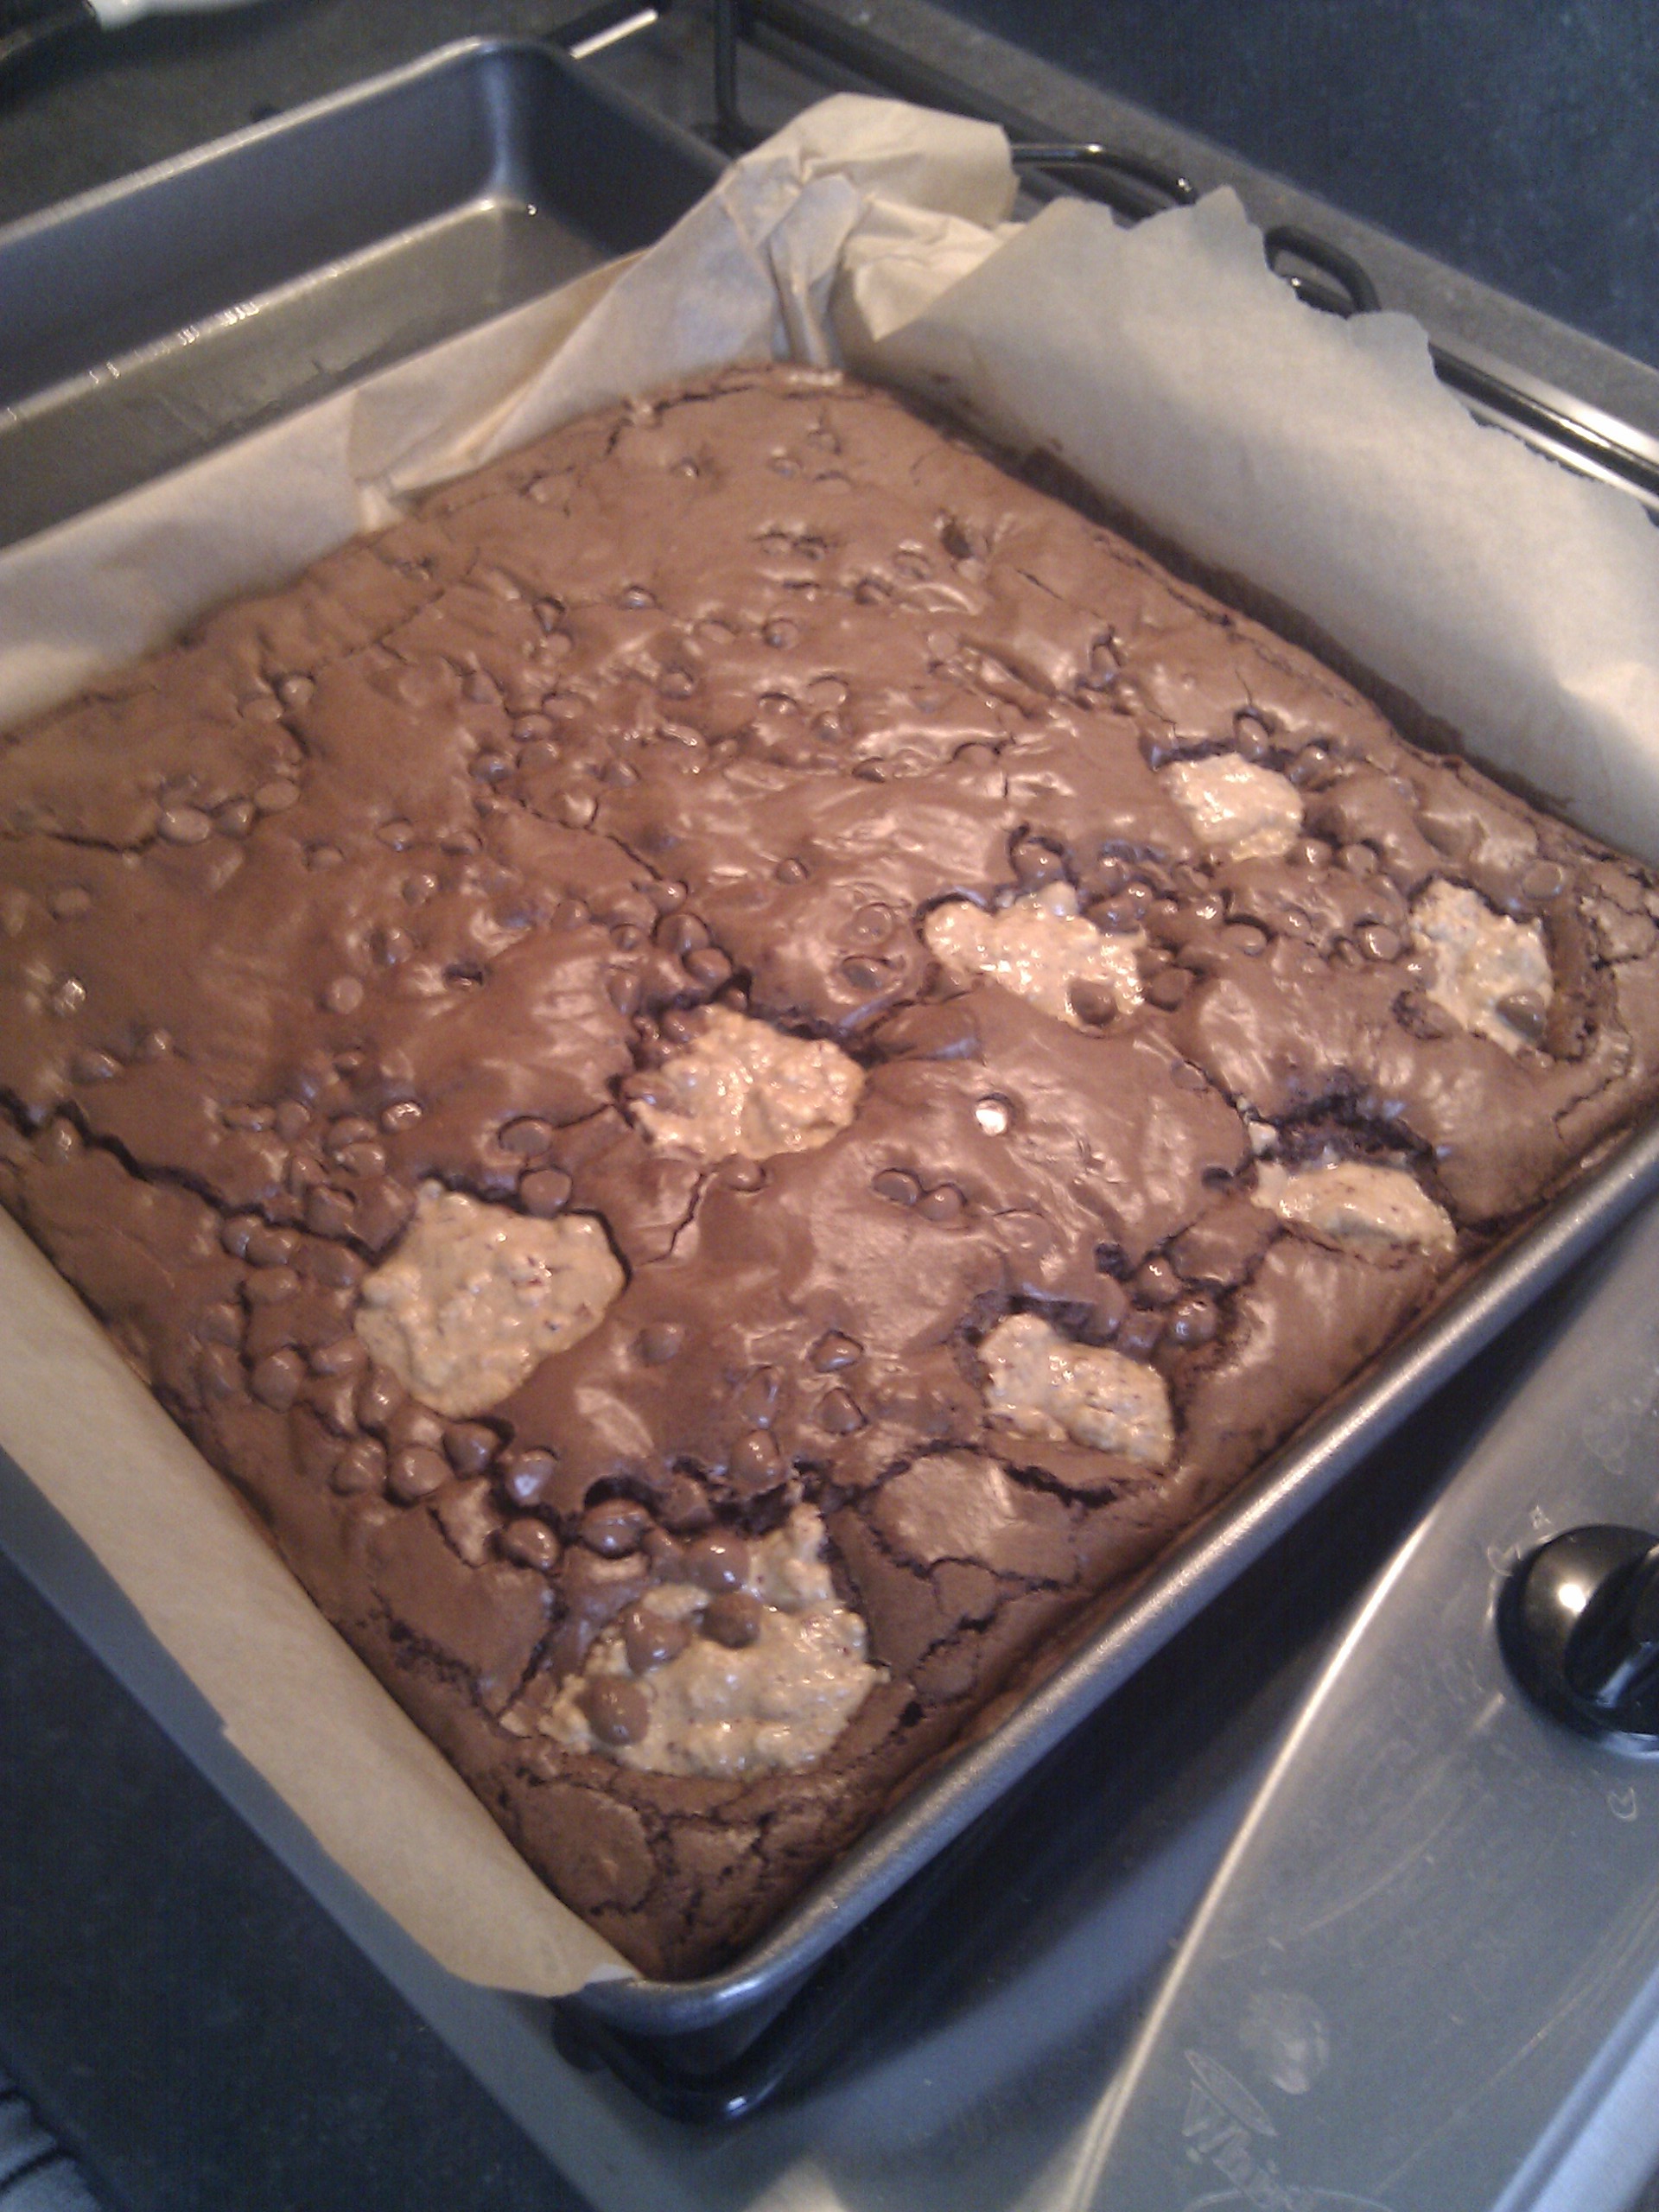
Line a 3cm high brownie tray with baking parchment and pour in the mixture, ease it in to the corners and smooth out the top.
Place dots of peanut butter on top of the mix (I did half with peanut butter and half without) then sprinkle the chocolate drops on top.
You don’t have to add peanut butter, why not try chopped nuts or chocolate orange segments?
Place the tray in the oven at 175C (I’ve got a fan oven) for 30 minutes.
Leave to cool, cut up into chunks!
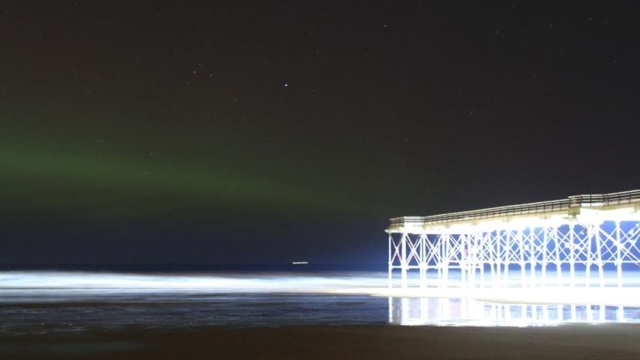
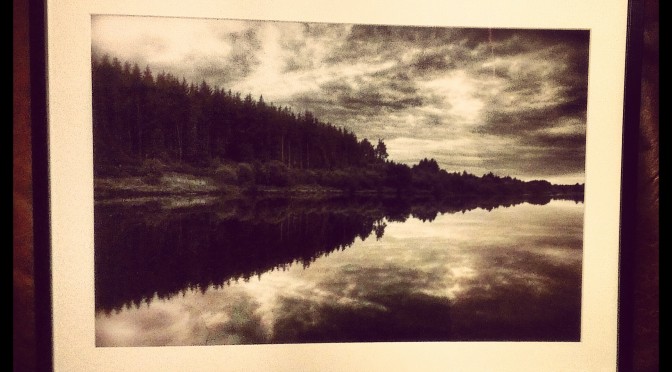
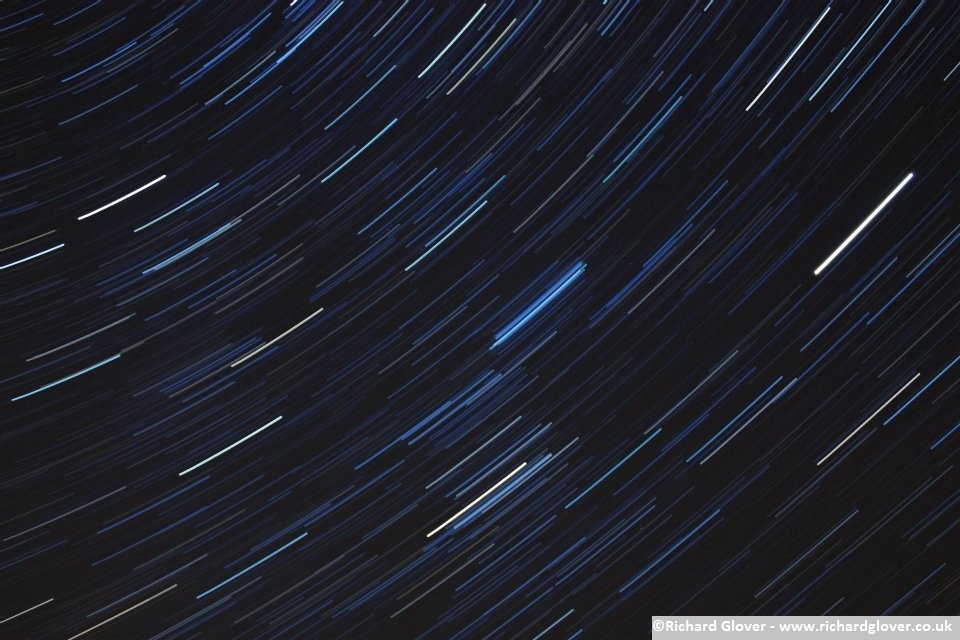
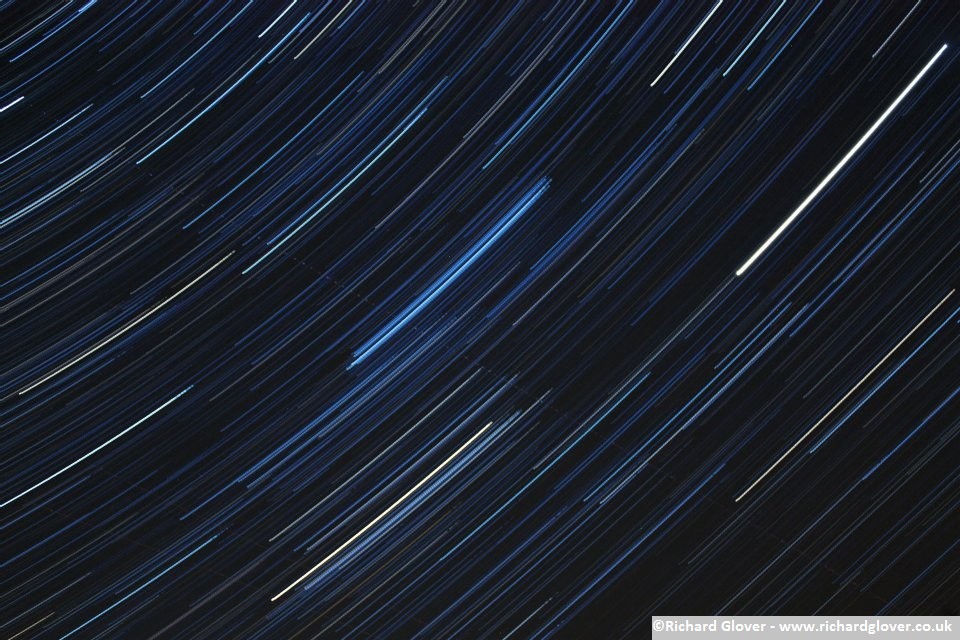
I’m no professional photographer, but I can use a camera. Last year I started taking pictures of star trails and recently with the hightened geomagnetic activity we thought we’d have a go at shooting the Aurora whilst it was here.

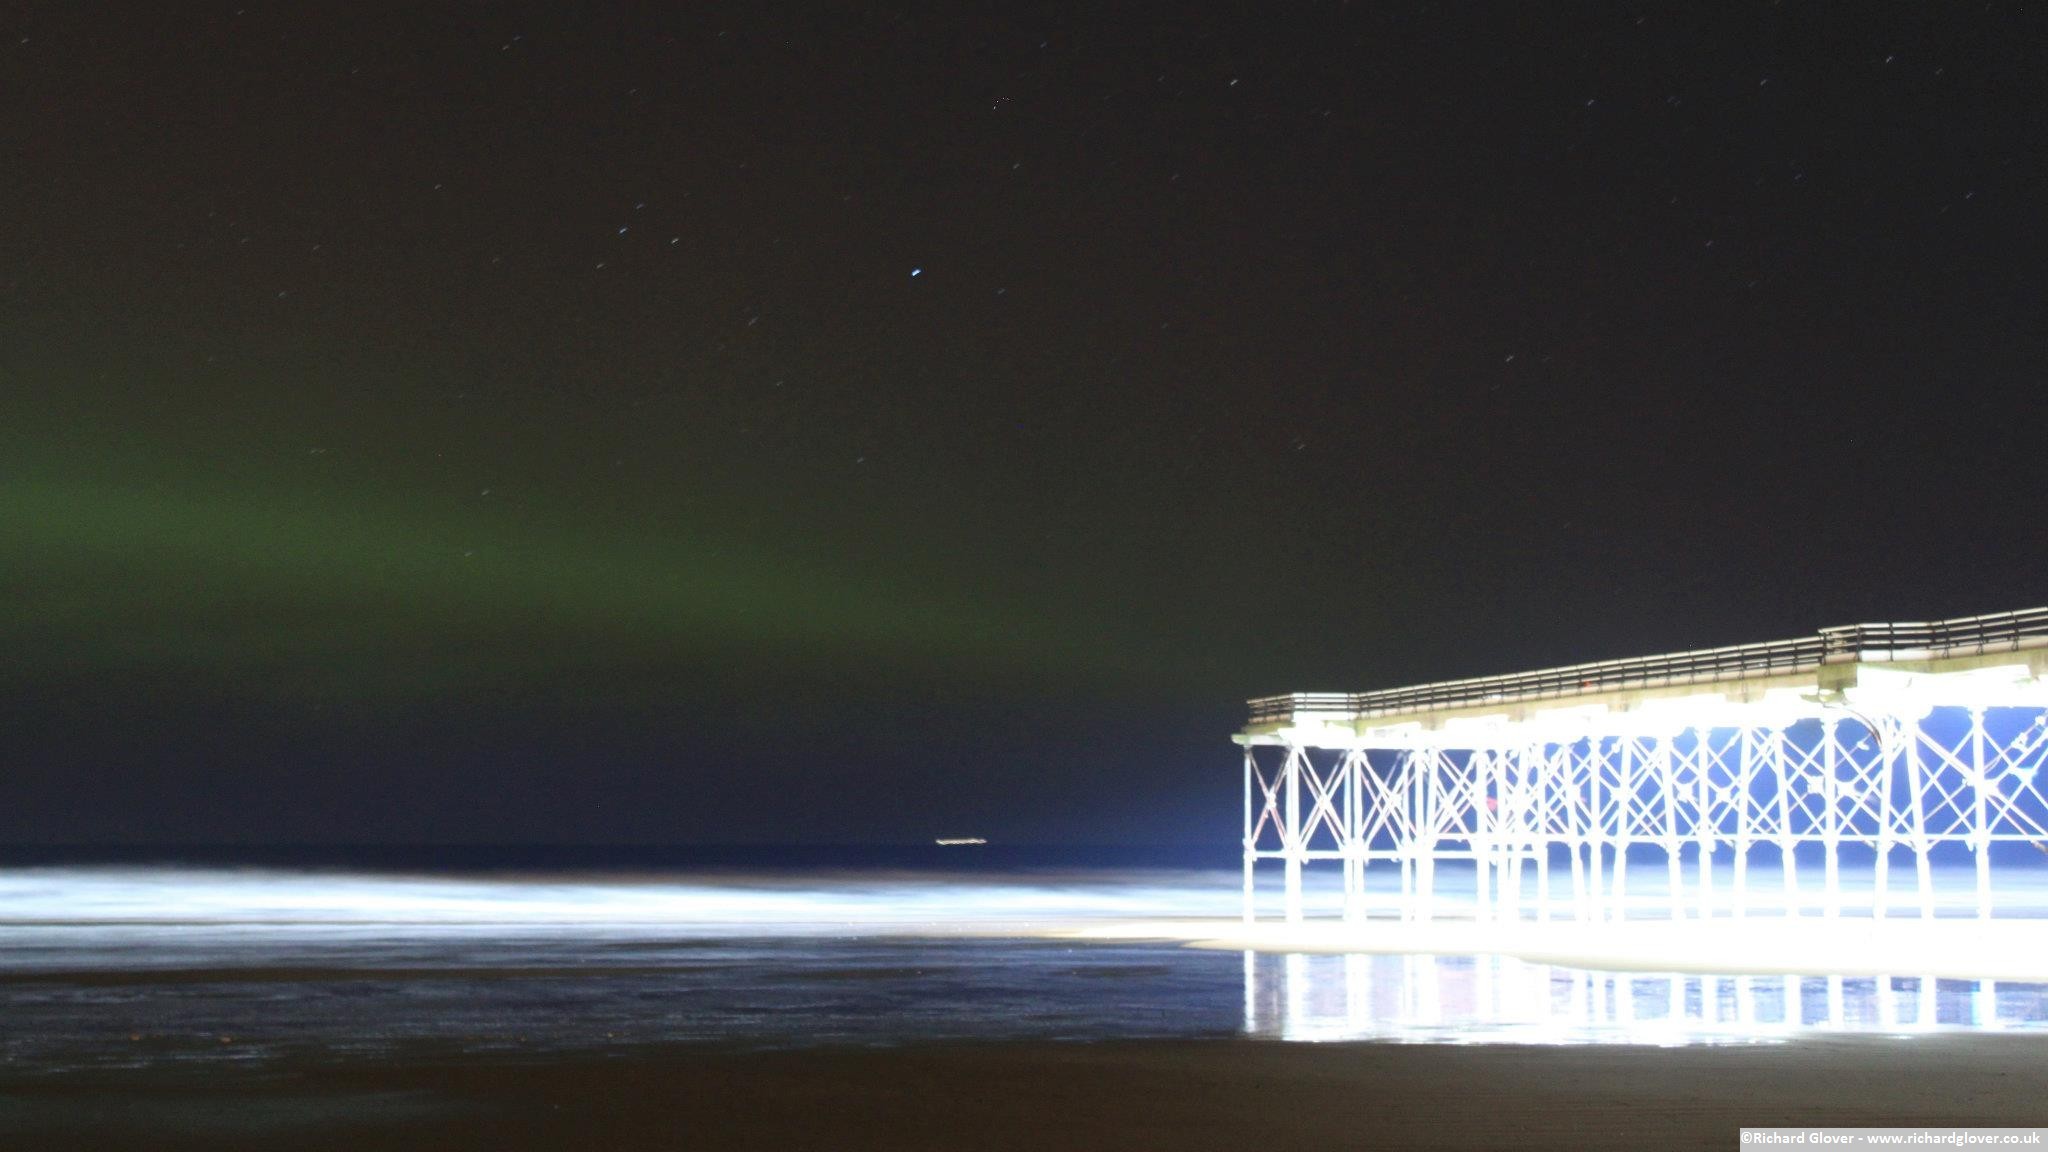
Depending on where you are and at what stage the Aurora is at will determine what you need. Over the last few days the ‘Kp index‘ of the Aurora has been fairly low, so the further south you are the dimmer the lights will appear. Ideally you need to be close to the earth’s magnetic poles but they’re still visable from further away. When we went out the green hue wasn’t really visible to look at, it just looked like a cloud in the sky near to the horizon, but with a digital SLR camera or high end compact you should be able to get some good results.
What you need
I’ve got a Canon 450D, it’s a few years old but it does exactly what I need it to do, it has Av and bulb modes which means I can set the shutter to be open for 30 seconds or more to capture all the available light.
My tripod is a Velbon CX-540, it stands tall enough to not need the elevator up so it stays steady in the wind. Because you’ll be taking long exposures you need to minimise any movement, even a light breeze will cause a blur in your pictures.
Using a remote shutter release also minimises any movement of the camera, because you’re not pressing the button down on the camera body it eliminates the initial shake, I’ve got a cheap Hama CA-1 for my Canon which also lets me lock the shutter down to shoot continually, useful for taking photographs of star trails.
What now?
So you’ve got the kit, what now? If you’re in the north east then the Aurora will usually appear fairly low to the horizon due to our location, you’ll need a good clear view from a dark location away from any light pollution. We had a ride out to Saltburn, it’s far enough away from any large towns, after midnight the pier lights go off too so bear that in mind if you want to use the pier as a focal point of your pictures.
Useful Resources