Project Lightning is Virgin Media’s latest expansion of their network, potentially passing 4 million extra premises, a large portion of it will break away from the traditional hybrid fibre-coaxial network and change to radio frequency over glass and FTTP.
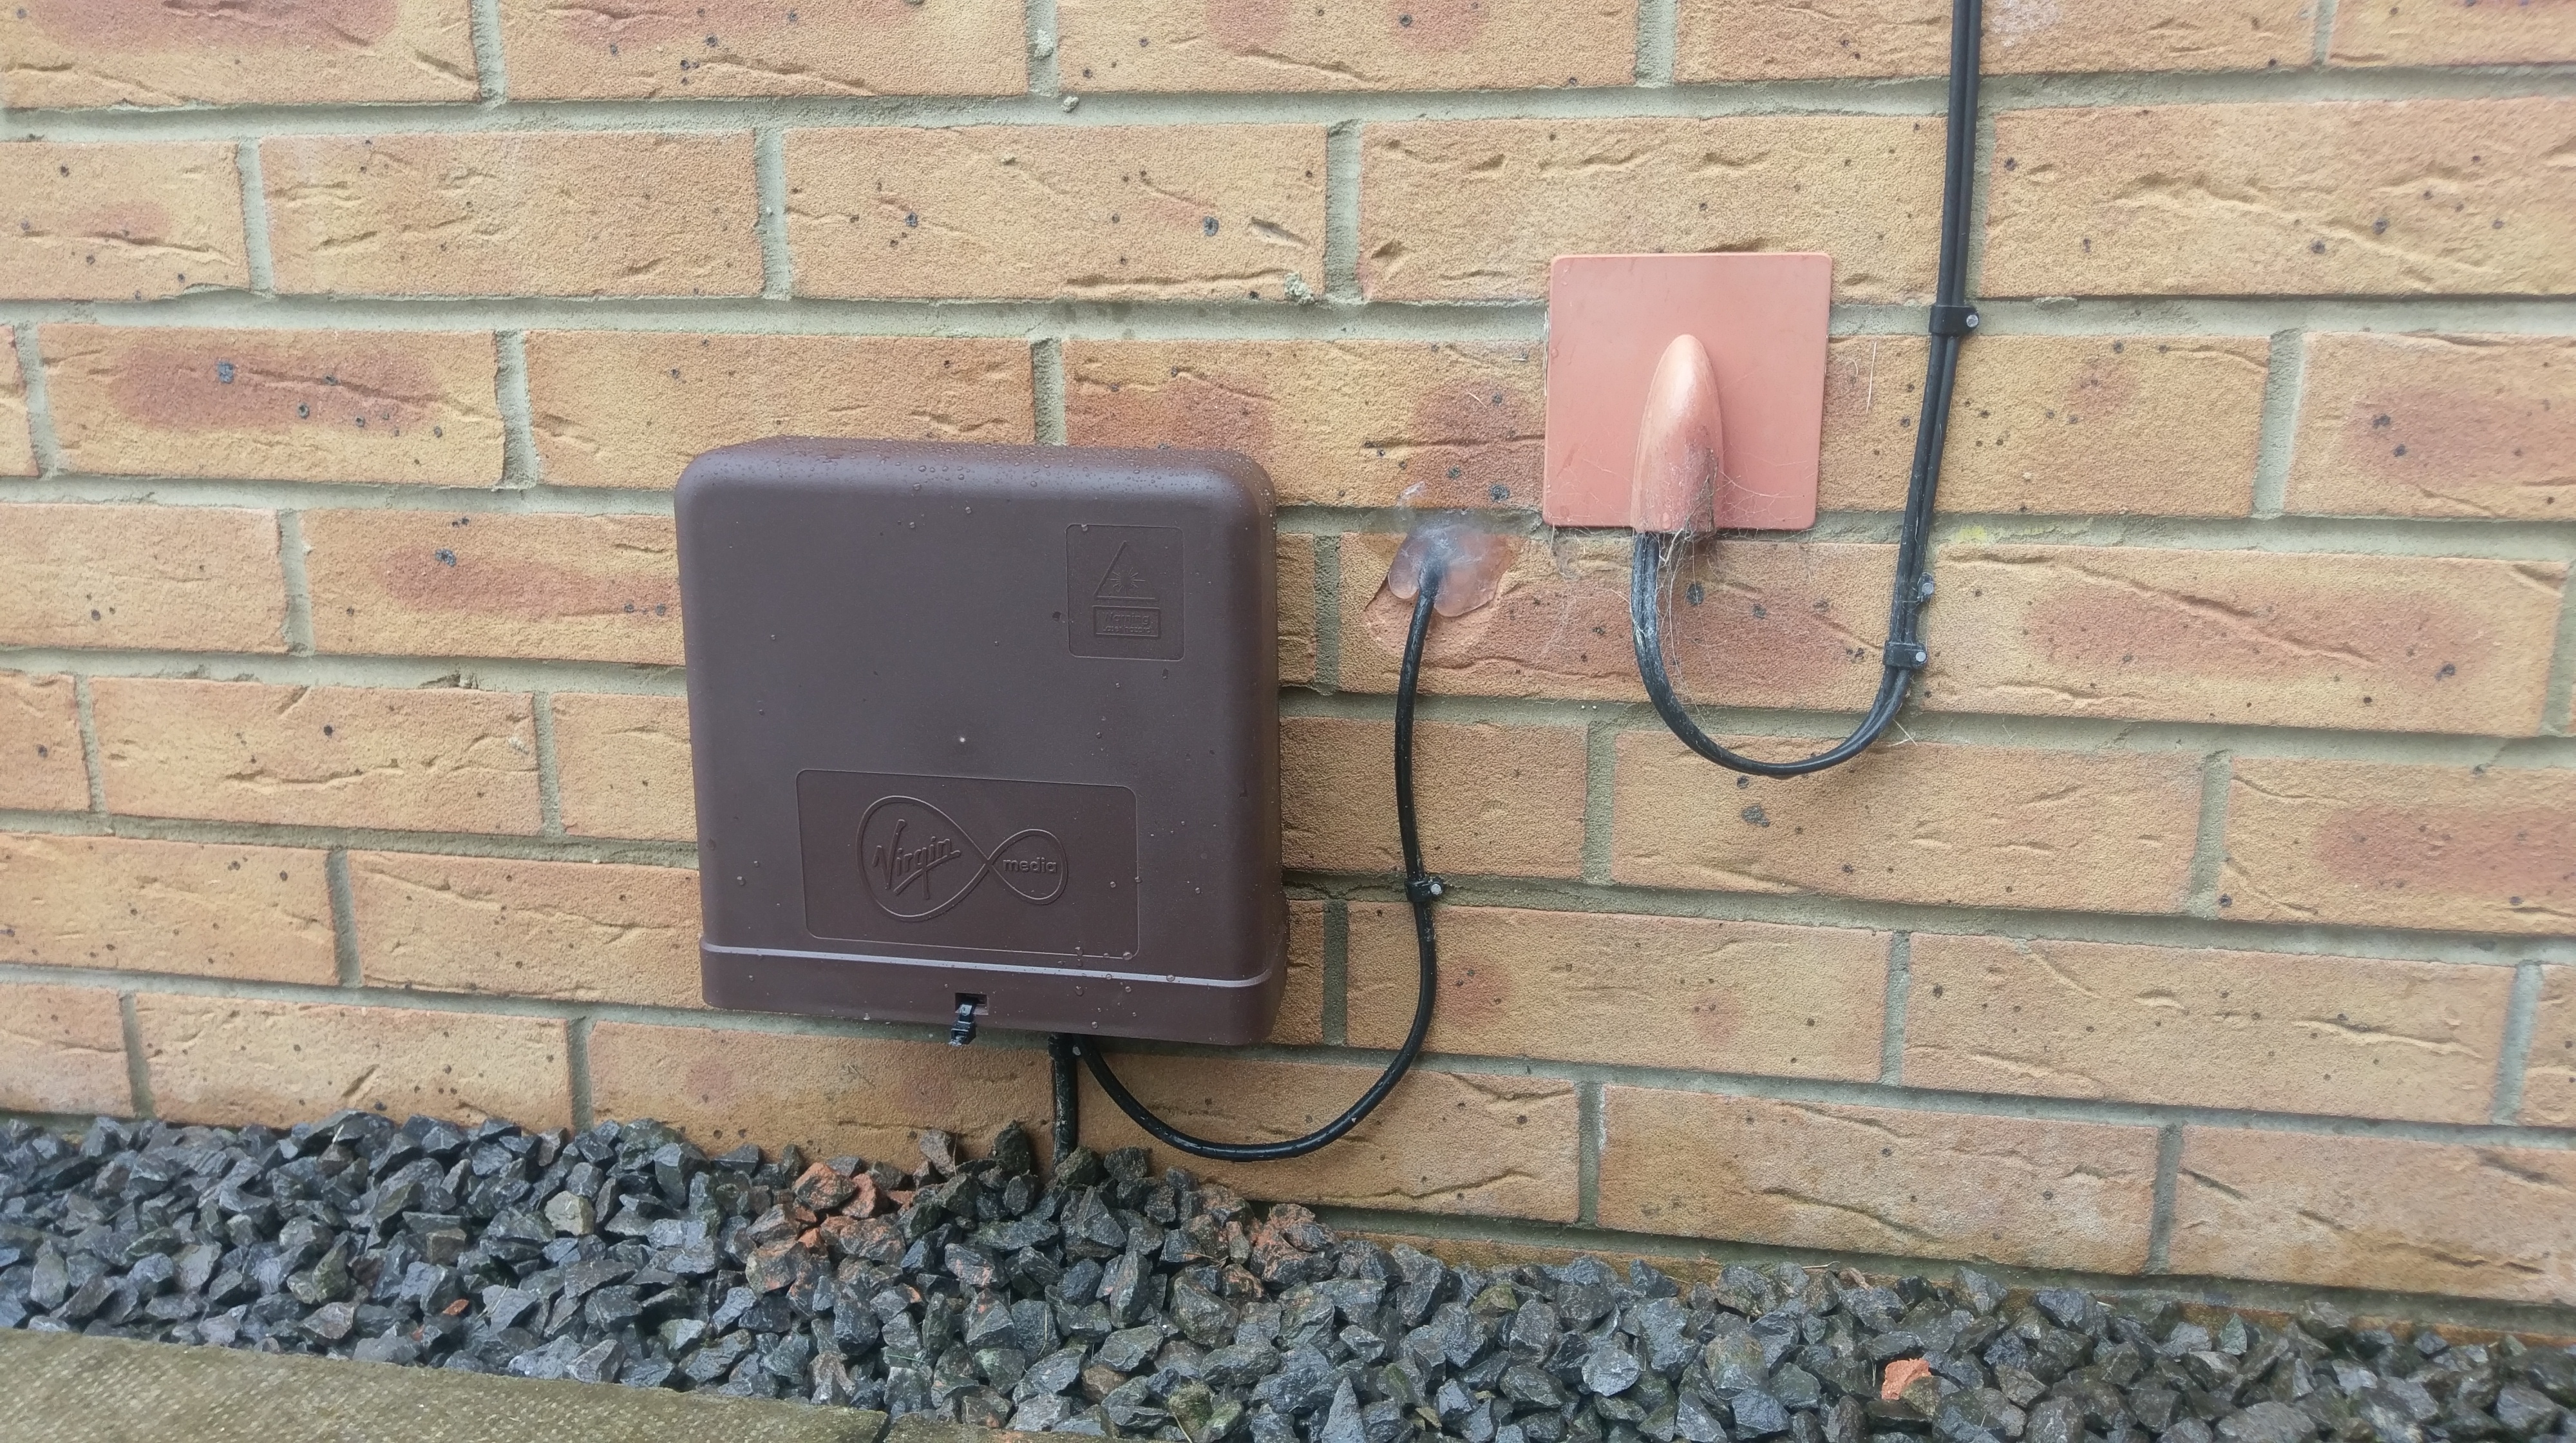
The installation took about 2 hours and was similar to an ordinary coaxial install, the CPE are the same as legacy installs but there’s now a larger “omnibox” that houses the incoming fibre and powered RFoG node.

The microduct contains the blown fibre, but it is only installed “spade depth” in the ground which could cause problems in the future if you were to change the surface.

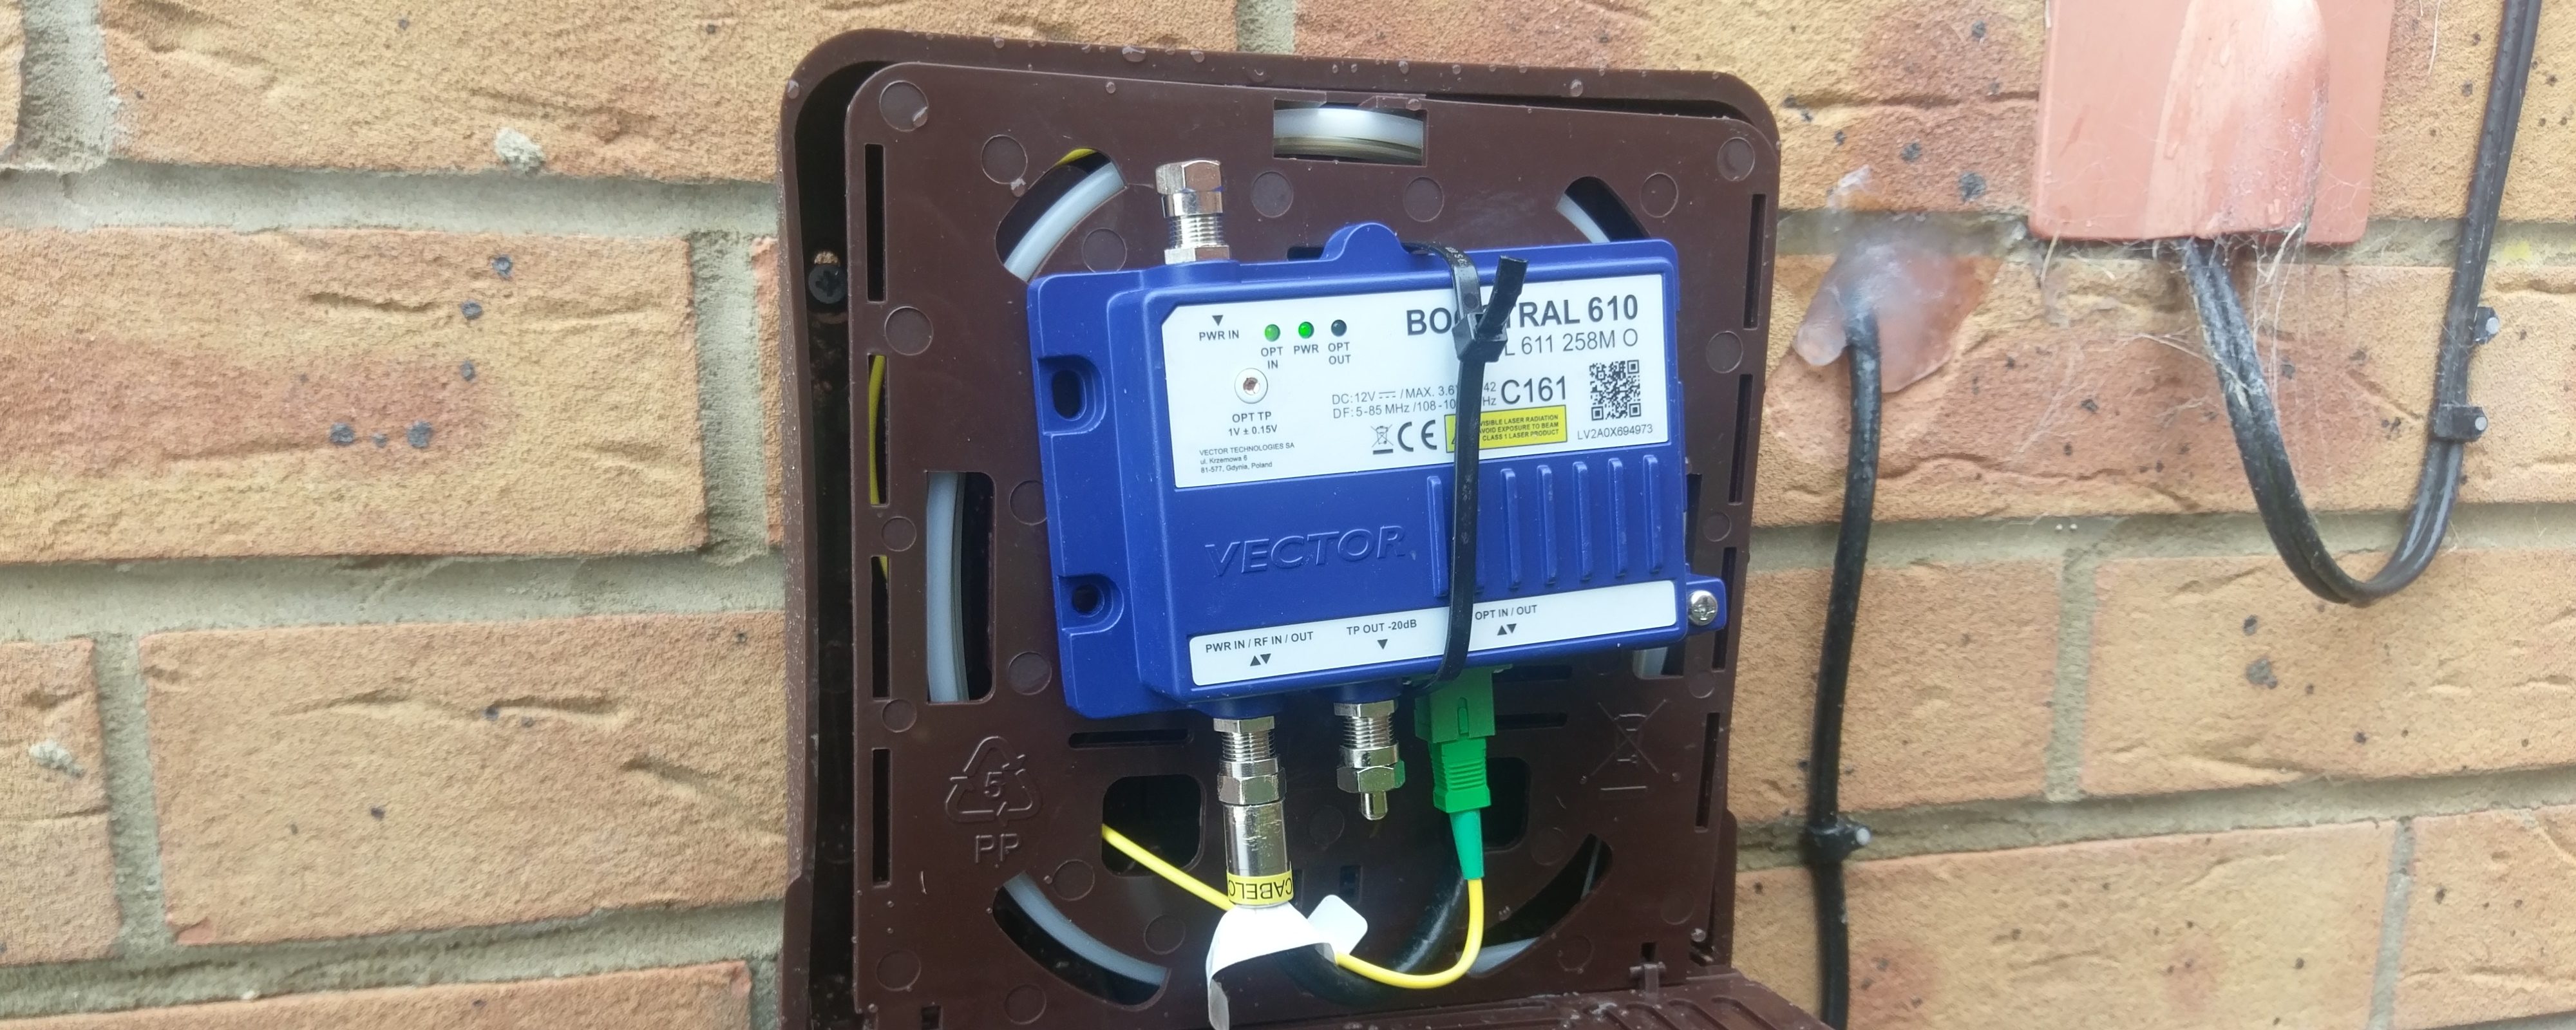
The external wall box is bigger than before, it houses the fibre which is pre terminated at one end with an SP/APC connector and blown to the local distribution cabinet where it is then spliced into the rest of the fibre network.
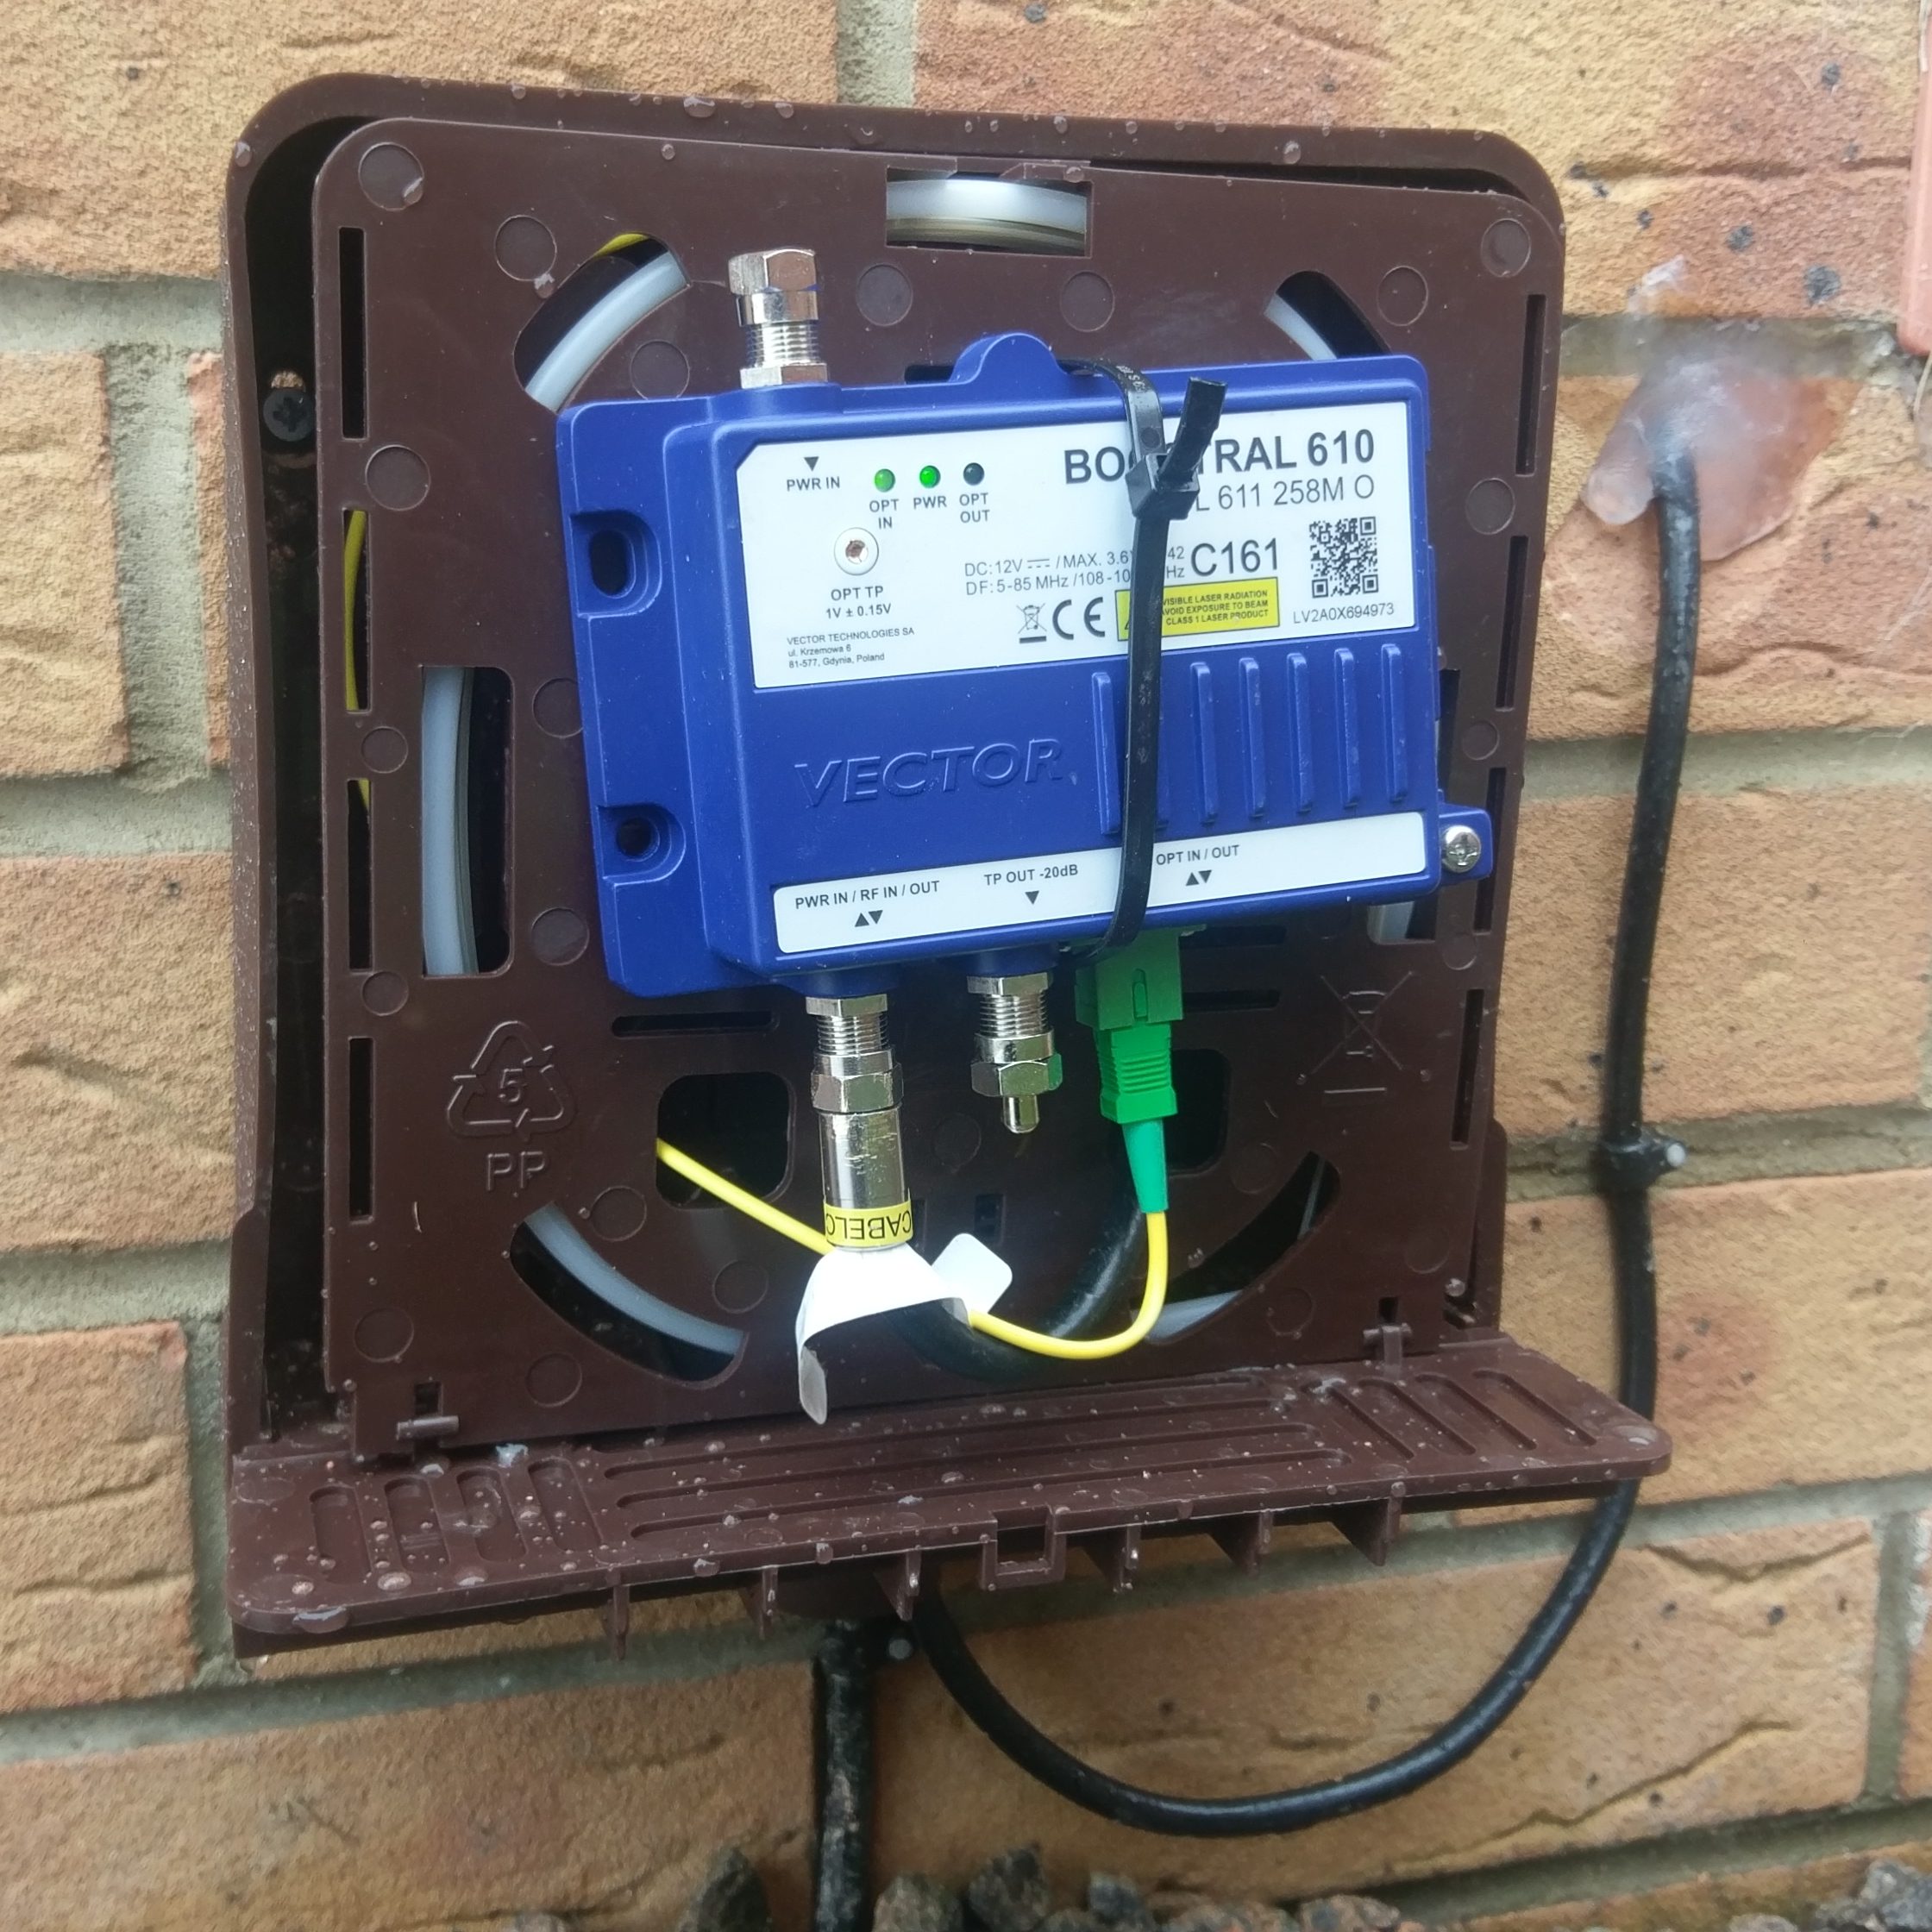
The RFoG node is a Vector BOOSTRAL 610 (superseded by the Vector BOOSTRAL 711) Which is IP42 rated for external use, the wall box cover doesn’t have a rubber seal and slides over the wall mounted piece, time will tell if it can stand the elements!
Vector BOOSTRAL 610 Data Sheet
If you’re interested, the Virgin Media Project Lightning Developers Guide shows a lot of the technical detail that makes up the local side of the new RFoG network.

I went for VIVID 200, a nice upgrade over the previous FTTC which topped out at about 30Mbps, we’ll have to see how things go as more and more customers are added to the network.
If you’ve got any questions about the install, head to the comments section below.